Putting brake cooling ducts on a c5 [project]
 02-28-2007, 11:26 AM
#1
Le Mans Master

Thread Starter

Well I just started this project, I will be working after work for an hour or so whenever I feel like it, so this project might not be done for another week or two.
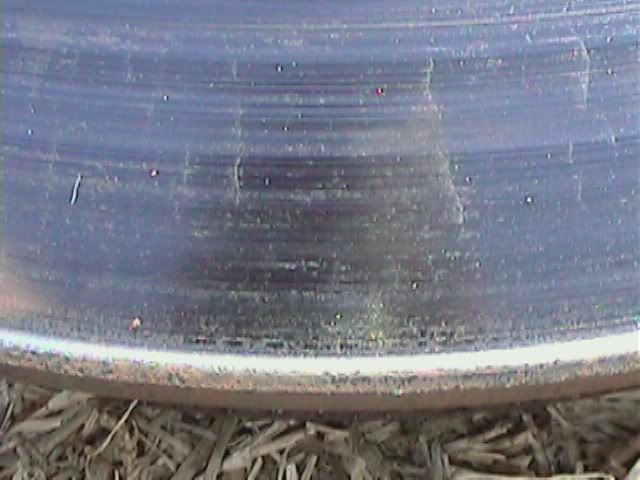
Lots of heat cracks beginning to form on my rotors, and they really haven't seen very hard use yet:
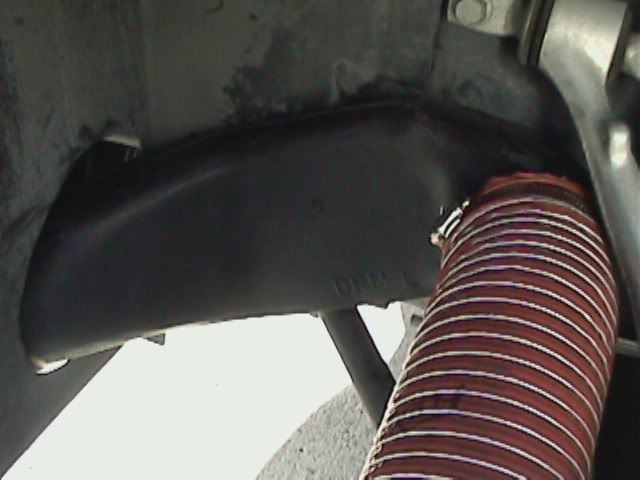
Brake ducts need trimming:
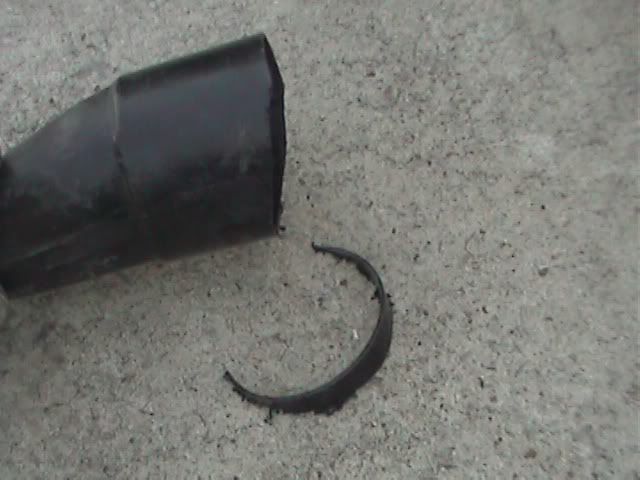
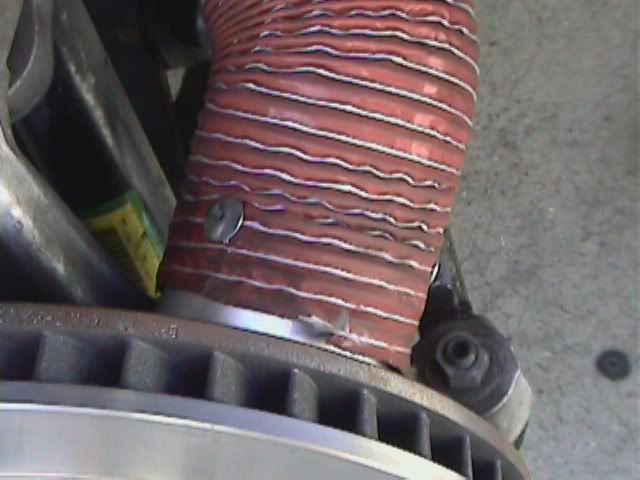
and unfortunately they don't fit over the stock brake ducts very well either, so I had to cut some slots in the sides so I could pinch the duct to a smaller diameter.
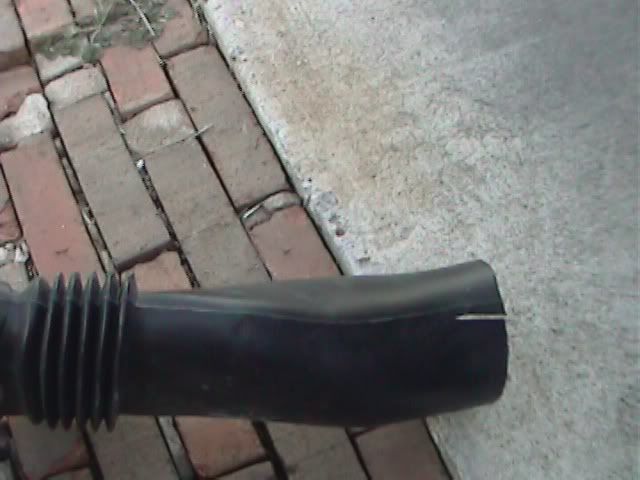
So far: Brake ducts don't fit the c5 duct diameter for a good fit trimming required, supplied hose doesn't fit the outlet diameter on the brake duct extensions (I was forewarned by vendor about that), and the spindle piece diameter is a few sizes to small for the hose, but that shouldn't be a problem to make work.
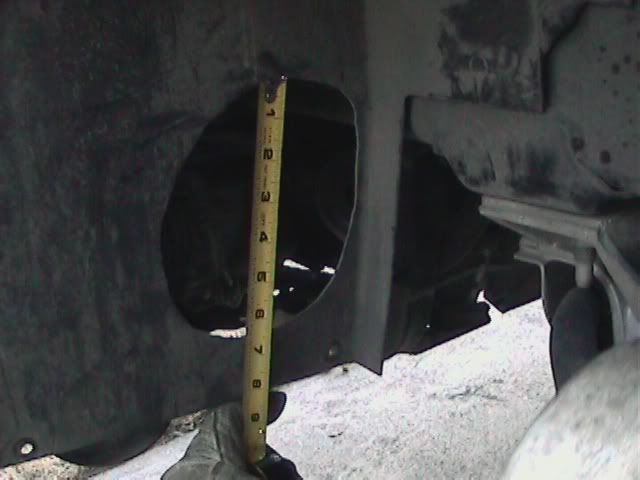
A lot of trimming seems to be required on the hole in the fiberglass panel that goes to the front bumper for the duct extension to lay flat against the frame of the vehicle.
this work goes best will my air powered die grinder, with a cylindrical bur bit.
So far I've got an hour and a half invested, and methinks this particular project will take a good bit longer. Usually, I'm a pretty good time estimater (I make my living planning and executing mechanical projects) but I think this project might take a little bit longer than I had initially thought.
Good thing I started early.
Lots of heat cracks beginning to form on my rotors, and they really haven't seen very hard use yet:
Brake ducts need trimming:
and unfortunately they don't fit over the stock brake ducts very well either, so I had to cut some slots in the sides so I could pinch the duct to a smaller diameter.
So far: Brake ducts don't fit the c5 duct diameter for a good fit trimming required, supplied hose doesn't fit the outlet diameter on the brake duct extensions (I was forewarned by vendor about that), and the spindle piece diameter is a few sizes to small for the hose, but that shouldn't be a problem to make work.
A lot of trimming seems to be required on the hole in the fiberglass panel that goes to the front bumper for the duct extension to lay flat against the frame of the vehicle.
this work goes best will my air powered die grinder, with a cylindrical bur bit.
So far I've got an hour and a half invested, and methinks this particular project will take a good bit longer. Usually, I'm a pretty good time estimater (I make my living planning and executing mechanical projects) but I think this project might take a little bit longer than I had initially thought.
Good thing I started early.
 03-01-2007, 11:19 AM
#2
Le Mans Master
Thread Starter
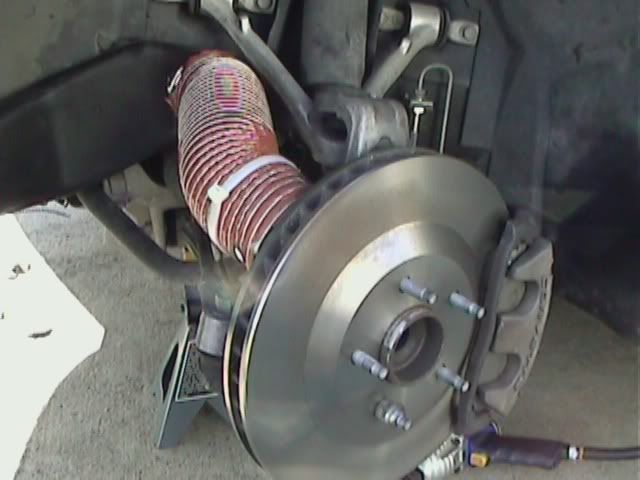
Finally, I was able to place the duct where I thought it should be. Two hours total time, from start of project. I ended up taking too much from the top of the hole, I will try to better that performance on the passenger side ductwork.
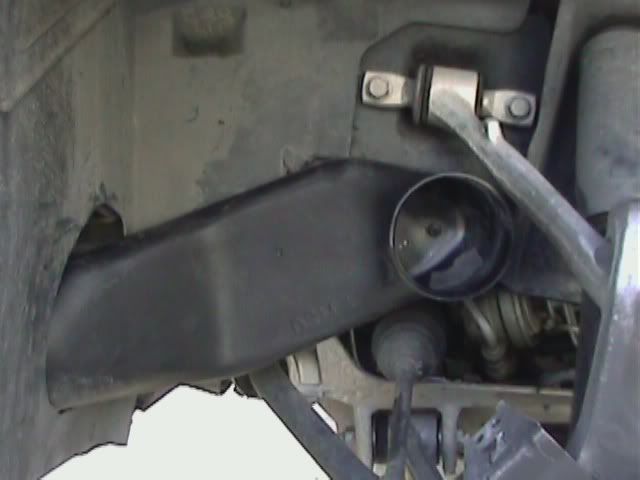
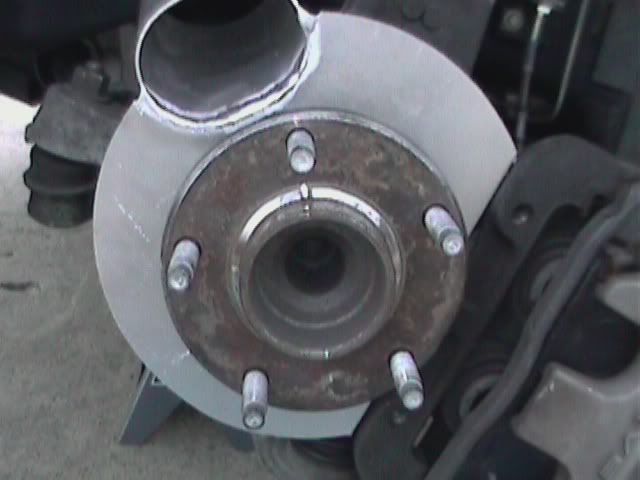
Now it was time to fit the piece to the rotor/bearing assembly. Looking at the initial alignment of the center hole and three bolts holes, I certainly wasn’t encouraged.
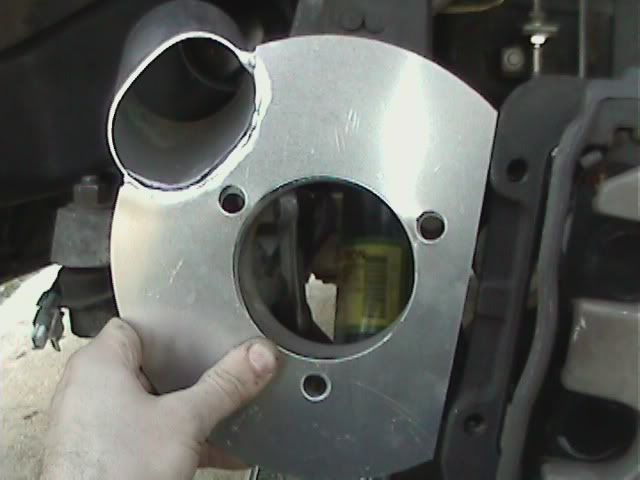
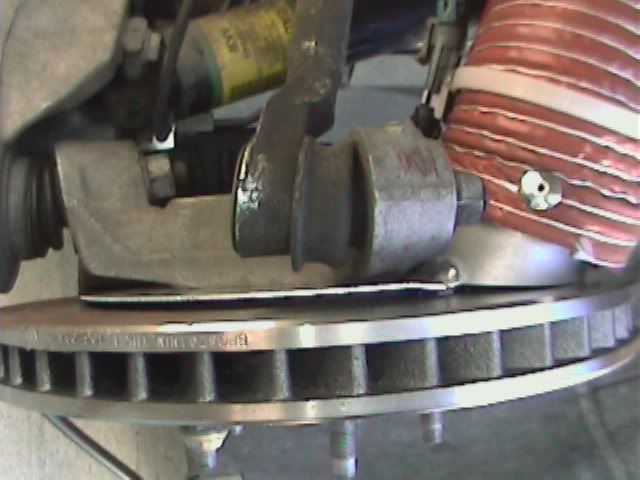
I fitted all the pieces together and cranked down on the bolts to get an idea of what else needed to be trimmed for interference. The big center hole and part of the welded tube needed to be trimmed in order to fit the pieces in their place.
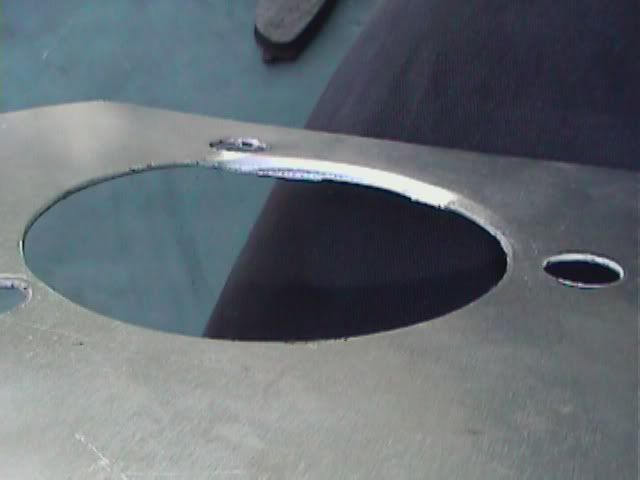
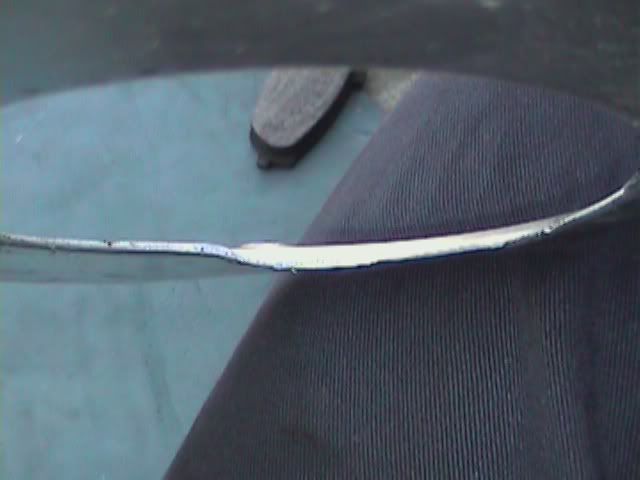
After more trimming with the trusty old die grinder (and I do mean old), the whole assembly seemed to fit fine. Not pictured here, but the welded tube needed to be massaged and ground to fit onto the spindle.
It's raining today, they say a very severe storm is headed our way, so I probably won't get time to fit the flexible silicon connecting ductwork on the axle today. I bought some broad umbrella rivets for that job when the time comes. So far, a total of about 2 hours from jacking the car up, to fitting the stationary ducts.
Now it was time to fit the piece to the rotor/bearing assembly. Looking at the initial alignment of the center hole and three bolts holes, I certainly wasn’t encouraged.
I fitted all the pieces together and cranked down on the bolts to get an idea of what else needed to be trimmed for interference. The big center hole and part of the welded tube needed to be trimmed in order to fit the pieces in their place.
After more trimming with the trusty old die grinder (and I do mean old), the whole assembly seemed to fit fine. Not pictured here, but the welded tube needed to be massaged and ground to fit onto the spindle.
It's raining today, they say a very severe storm is headed our way, so I probably won't get time to fit the flexible silicon connecting ductwork on the axle today. I bought some broad umbrella rivets for that job when the time comes. So far, a total of about 2 hours from jacking the car up, to fitting the stationary ducts.
03-01-2007, 11:42 AM
#3
Former Vendor

Looks good!!! This cooling setup will help your braking issues. The hose coming out of our duct should be 3.5 and have a real tight fit. The reason for have a super tight fit is so it can't come off. The best way of installing the hose is to thread it on like a bolt. Some times you have to push in the ridge with your thumb as you screaw it in.
Randy
Randy
03-01-2007, 11:50 AM
#4
Le Mans Master
Thread Starter
Looks good!!! This cooling setup will help your braking issues. The hose coming out of our duct should be 3.5 and have a real tight fit. The reason for have a super tight fit is so it can't come off. The best way of installing the hose is to thread it on like a bolt. Some times you have to push in the ridge with your thumb as you screaw it in.
Randy
Randy
03-01-2007, 01:04 PM
#5
Drifting


Hey, I'm on the same project  I did the opposite, and I'm putting the Z06 duct inside of the stock duct, its not great, but should allow decent air flow, probably not as good as what your doing. Got these on last night as well:

I did the spindel ducts a week ago, I had to do a little more moding on the passengers side duct, but the drivers side was good.
Need to pick up some hose clamps today and finish it off tonight.
What did you do for the wheel speed sensor?
How are you going to attach the hose to the z06 duct? I was thinking pop rivets, but not 100% sure yet.

I did the opposite, and I'm putting the Z06 duct inside of the stock duct, its not great, but should allow decent air flow, probably not as good as what your doing. Got these on last night as well:I did the spindel ducts a week ago, I had to do a little more moding on the passengers side duct, but the drivers side was good.
Need to pick up some hose clamps today and finish it off tonight.
What did you do for the wheel speed sensor?
How are you going to attach the hose to the z06 duct? I was thinking pop rivets, but not 100% sure yet.
03-01-2007, 01:15 PM
#6
Race Director

Remember too, that you've shimmed the hub and rotor out more than the OEM steel will. It shouldn't matter with the stock, floating caliper, but if you ever go aftermarket brakes, the rotor will not be centered in the caliper. I had this happen with stoptechs, and you have to shim the calipers out as well.
Nice setup. Do you do your own aluminum welding???? I have not yet been able to master that!
Nice setup. Do you do your own aluminum welding???? I have not yet been able to master that!
03-01-2007, 01:50 PM
#8
Premium Supporting Vendor
Member Since: Oct 2004
Location: Providing the most proven supercharger kits for your C5/6/7 609-752-0321
Posts: 23,333
Received 1,097 Likes
on
661 Posts

This is a great, relatively inexpensive mod that makes a big difference on the rotors. Good luck with it.

David Farmer, good advice on the caliper placement. I have Stop Techs also with our spindle ducts and where within spec, but always good to look at.
03-01-2007, 02:58 PM
#9
Le Mans Master
Thread Starter
Hey, I'm on the same project I did the opposite, and I'm putting the Z06 duct inside of the stock duct, its not great, but should allow decent air flow, probably not as good as what your doing. Got these on last night as well:
I did the spindel ducts a week ago, I had to do a little more moding on the passengers side duct, but the drivers side was good.
Need to pick up some hose clamps today and finish it off tonight.
What did you do for the wheel speed sensor?
How are you going to attach the hose to the z06 duct? I was thinking pop rivets, but not 100% sure yet.
I did the opposite, and I'm putting the Z06 duct inside of the stock duct, its not great, but should allow decent air flow, probably not as good as what your doing. Got these on last night as well:I did the spindel ducts a week ago, I had to do a little more moding on the passengers side duct, but the drivers side was good.
Need to pick up some hose clamps today and finish it off tonight.
What did you do for the wheel speed sensor?
How are you going to attach the hose to the z06 duct? I was thinking pop rivets, but not 100% sure yet.
03-01-2007, 03:04 PM
#10
Le Mans Master
Thread Starter
Remember too, that you've shimmed the hub and rotor out more than the OEM steel will. It shouldn't matter with the stock, floating caliper, but if you ever go aftermarket brakes, the rotor will not be centered in the caliper. I had this happen with stoptechs, and you have to shim the calipers out as well.
Nice setup. Do you do your own aluminum welding???? I have not yet been able to master that!
Nice setup. Do you do your own aluminum welding???? I have not yet been able to master that!
-I'm thinking rivets to the aluminum plate, and then screws to the plastic ductwork. If you are interested in who, pm me, I don't wanna start a bunch of **** with a vendor about the 'less than ideal' fitment.
 03-01-2007, 03:26 PM
#12
Premium Supporting Vendor
Member Since: Oct 2004
Location: Providing the most proven supercharger kits for your C5/6/7 609-752-0321
Posts: 23,333
Received 1,097 Likes
on
661 Posts
Thanks Earthman!
2000BSME, Like I said, I am not sure if they are ours or not, but feel free to say so if they are. I have sold and installed way to many to have major fitment issues so I would like to try and get to the bottom of it so it can be prevented for others. No problems.
03-01-2007, 03:27 PM
#13
Melting Slicks

Originally Posted by 2000BSME;1559181988
-I'm thinking rivets to the aluminum plate, and then screws to the plastic ductwork. If you are interested in [I
-I'm thinking rivets to the aluminum plate, and then screws to the plastic ductwork. If you are interested in [I
who[/I], pm me, I don't wanna start a bunch of **** with a vendor about the 'less than ideal' fitment.
I have the C4 and have been fabbing some ducts for others. Its great to have close tolerances, but I do leave a bit of room in certain areas for I know we all want easy bolt on stuff. Its not important for me to know who fabbed yours. As stated, the important part is the results.
03-01-2007, 03:39 PM
#14
Race Director
Doug, do you have a link to your ducts? I'm running home-made right now (other priorities, like the CAGE), but need to either buy or make some to seal the air up tight.
03-01-2007, 05:29 PM
#15
Team Owner

Hey, I'm on the same project I did the opposite, and I'm putting the Z06 duct inside of the stock duct, its not great, but should allow decent air flow, probably not as good as what your doing. Got these on last night as well:
I did the spindel ducts a week ago, I had to do a little more moding on the passengers side duct, but the drivers side was good.
Need to pick up some hose clamps today and finish it off tonight.
What did you do for the wheel speed sensor?
How are you going to attach the hose to the z06 duct? I was thinking pop rivets, but not 100% sure yet.
I did the opposite, and I'm putting the Z06 duct inside of the stock duct, its not great, but should allow decent air flow, probably not as good as what your doing. Got these on last night as well:I did the spindel ducts a week ago, I had to do a little more moding on the passengers side duct, but the drivers side was good.
Need to pick up some hose clamps today and finish it off tonight.
What did you do for the wheel speed sensor?
How are you going to attach the hose to the z06 duct? I was thinking pop rivets, but not 100% sure yet.
Place the wheel sensor clip under the hose clamp that is around the spindle duct.
03-01-2007, 05:32 PM
#16
Premium Supporting Vendor
Member Since: Jan 2001
Location: Central Jersey
Posts: 17,681
Likes: 0
Received 8 Likes
on
8 Posts
Cruise-In II Veteran
Cruise-In III Veteran
Cruise-In V Veteran

Hey Guys, here are a few pics of our complte kit. The complete price is $379. Any questions at all, feel free to call us at the shop. You can also buy our kit piece meal. The DRM ducts are $199 and our spindle kit is $179.. 
__________________


Home of the Fastest Supercharged C5 8.4 @ 158mph
Home of the Fastest Supercharged IRS GTO 9.0@ 155
Home of the Fastest Supercharged C6 9.7 @ 143mph
Proud Sponsor of the ECS Corvette Challenge
http://www.corvettechallenge.info
609-752-0321
Home of the Fastest Supercharged C5 8.4 @ 158mph
Home of the Fastest Supercharged IRS GTO 9.0@ 155
Home of the Fastest Supercharged C6 9.7 @ 143mph
Proud Sponsor of the ECS Corvette Challenge
http://www.corvettechallenge.info
609-752-0321
03-02-2007, 09:31 PM
#17
Le Mans Master
Thread Starter
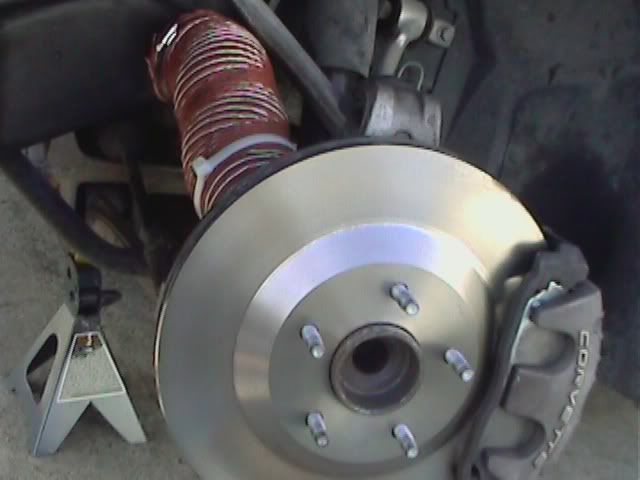
Here we are, 4 working hours later. I decided to go ahead and put my spare discs on too. I need to clean up the ridge on my other discs. This offered a logical time to also put my track pads back on, Hawk Blues on front only, Hawk HPS will remain on the rears.
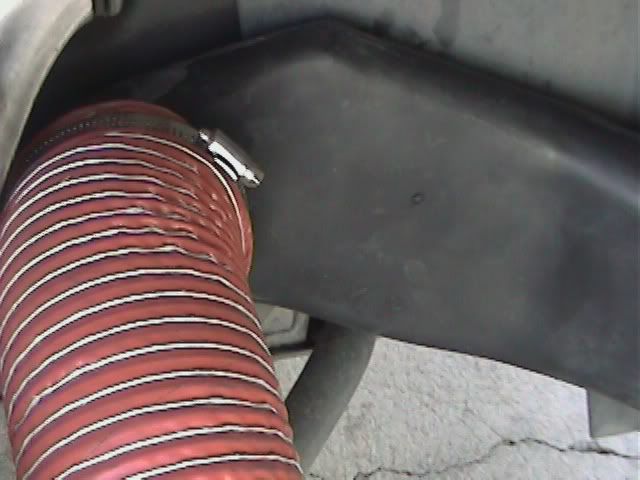
A steel rivet on either side of the duct will hold the duct in place, and a large zip tie will hold the abs sensor in place with the original clip still on the abs sensor.
The advice of Randy@DRM was perfect, and while I was skeptical, the ducts went on perfectly using his method of 'screwing' on. I used a large worm gear hose clamp to make sure the duct work stays in place.
I tested the motion of the steering and suspension with and without tires, and it appears as though there won't be any major interference issues.
Hopefully the weather will be nice enough this weekend to finish the other side too. I've already taken it apart completely, now I'm ready to trim up the pieces and fit them all together. I estimate another 3hrs of work, for a likely total of 7hrs for the project.
Just got my HPTuners software today, and now I'm going to play with my 'stock' file a little bit. Still waiting on the power steering cooler.
Last edited by 2000BSME; 03-02-2007 at 09:34 PM.
03-02-2007, 09:59 PM
#18
Premium Supporting Vendor
Member Since: Oct 2001
Location: Dallas Tx
Posts: 8,392
Received 571 Likes
on
292 Posts
St. Jude Vendor Donor '03-'04-'05-'06-'07-'08-'09-'10-'11

Our kits sometimes take a slight deburring, but not usually.
our kits cost $169 and we have 3.5" ducts or 3" ducts
The 3 inch cause less intrusion with the tires.
GIve us a call anytime and we will answer any questions that you have.
Changing the entire package like you did in 3.5 hours per side is not bad.
Thanks
Lou gigliotti
And for the month of March we are giving another 10% off the spindle ducts to forum members.
__________________
LG Pro LT Headers, MOST HP, MOST TORQUE
http://lgmotorsports.com/gallery/alb...no_compare.jpg


LGM http://www.LGMotorsports.com
Winner Daytona 250
22 WC Wins
"Most powerful Corvette headers on the planet"

LG Pro LT Headers, MOST HP, MOST TORQUE
http://lgmotorsports.com/gallery/alb...no_compare.jpg
LGM http://www.LGMotorsports.com
Winner Daytona 250
22 WC Wins
"Most powerful Corvette headers on the planet"
Last edited by LG Motorsports; 03-02-2007 at 10:02 PM.
03-03-2007, 04:53 PM
#19
Le Mans Master
Thread Starter
The other side didn't take me half as long. About two hours total to be exact. I knew quickly what needed to be trimmed or 'deburred' and things just went together quickly.

Everything is together well, and I am satified with the system. About 6hrs total labor, with the right tools and know-how.
Now I get to wait for my p.s. cooler, and then install that.
I just installed my first vcm tune with HPtuners, and remarkably, I accomplished exactly what I set out to on my transmission, on my first tune, at least it feels that way on the first test drive. I did study quite a bit before I even got the software though. Too bad that I cannot tune for the viscosity change that will happen once the fluid gets to track temperature. Hopefully I can get it as good as possible, and I won't have too many surprises when I track it.