
1999 FRC Rear window Reveal Molding Installation
 07-11-2010, 03:52 PM
#1
Advanced

Thread Starter


The 1999 FRC Rear window Reveal Moldings consist of several pieces that are (now) listed under a single part number 10400804 - Back Glass Reveal, all pieces. However, I have not been able to find that number.
The 01 FRC rear window reveal moldings are p/n 88948473 and the 01 rear glass is the same part number as my 99. I decided to install the 01 part on my 99.
Give the area a cleaning, then grab the old molding and pull it out, away from the glass and discard. It will probably be necessary to work out a few spots where the molding tears away from itself. The glass is held in with adhesive and will not fall out. The molding is just that, molding. For appearance only, and is held in seperately.
I then proceeded to clean the channel where the molding sits between the body and the glass, removing any left over black ashesive that was used to hold the old molding. I used bug and tar remover and elbow grease. a bit of compressed air.
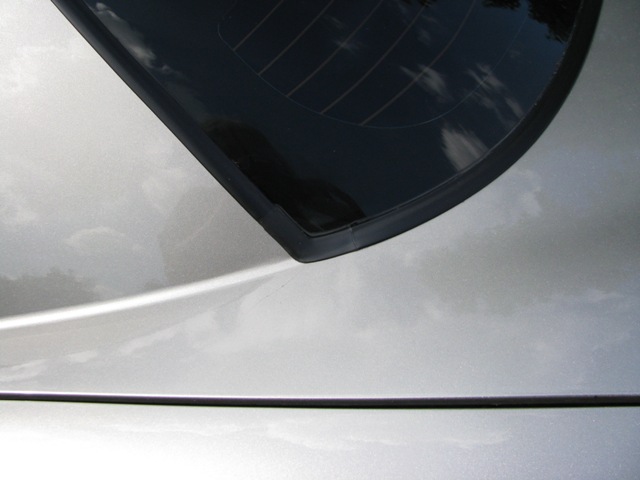
Examine the gap around the glass between it and the body. Note the narrow spots. these will be a bit more difficult.
Look at the new molding and align it over the rear glass with blue tape in a few places. Note that the new molding is one piece, and has a "J-channel" or "groove" that the glass sits in. The challenge is to force that into the gap having the channel fit around the glass.
I used a small screwdriver and a small allen wrench to manipulate the channel under the glass, then forcing the back side of the trim down into the gap, finally pushing on the exposed surface to seat it in place. I started at the two corners, working towards the center. Some of the molding just slipped into place because the gap was wider. The narrow gap places required some patience and effort.
The new molding DOES have a black adhesive on it (inside the groove where the glass sits) and will get a bit messy. If you are not careful you can stretch the molding (during installation) giving you an excess to have to distribute along the length.
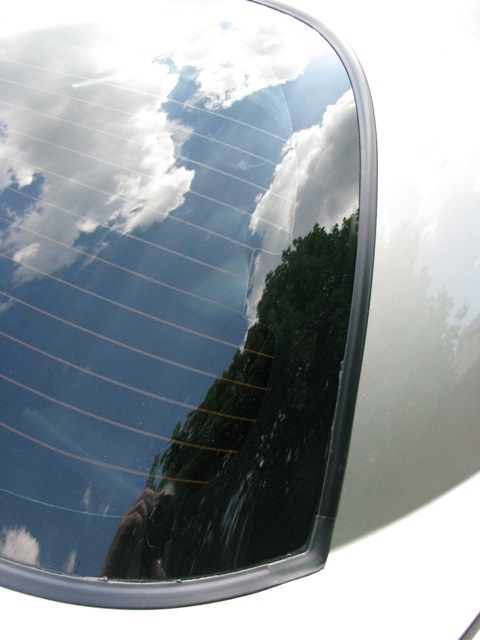
After working it in inch by inch, you are left with a cleanup using bug and tar remover to get rid of the old adhesive. Looks like factory.
The 01 FRC rear window reveal moldings are p/n 88948473 and the 01 rear glass is the same part number as my 99. I decided to install the 01 part on my 99.
Give the area a cleaning, then grab the old molding and pull it out, away from the glass and discard. It will probably be necessary to work out a few spots where the molding tears away from itself. The glass is held in with adhesive and will not fall out. The molding is just that, molding. For appearance only, and is held in seperately.
I then proceeded to clean the channel where the molding sits between the body and the glass, removing any left over black ashesive that was used to hold the old molding. I used bug and tar remover and elbow grease. a bit of compressed air.
Examine the gap around the glass between it and the body. Note the narrow spots. these will be a bit more difficult.
Look at the new molding and align it over the rear glass with blue tape in a few places. Note that the new molding is one piece, and has a "J-channel" or "groove" that the glass sits in. The challenge is to force that into the gap having the channel fit around the glass.
I used a small screwdriver and a small allen wrench to manipulate the channel under the glass, then forcing the back side of the trim down into the gap, finally pushing on the exposed surface to seat it in place. I started at the two corners, working towards the center. Some of the molding just slipped into place because the gap was wider. The narrow gap places required some patience and effort.
The new molding DOES have a black adhesive on it (inside the groove where the glass sits) and will get a bit messy. If you are not careful you can stretch the molding (during installation) giving you an excess to have to distribute along the length.
After working it in inch by inch, you are left with a cleanup using bug and tar remover to get rid of the old adhesive. Looks like factory.
Last edited by 5.0 RACER; 07-11-2010 at 04:20 PM.

The following users liked this post:
Torch Red Fire 21 (03-03-2024)
07-11-2010, 04:07 PM
#2
Team Owner

The 1999 FRC Rear window Reveal Moldings consist of several pieces that are (now) listed under a single part number 10400804 - Back Glass Reveal, all pieces. However, I have not been able to find that number.
The 01 FRC rear window reveal moldings are p/n 88948473 and the 01 rear glass is the same part number as my 99. I decided to install the 01 part on my 99.
Give the area a cleaning, then grab the old molding and pull it out, away from the glass and discard. It will probably be necessary to work out a few spots where the molding tears away from itself.
Any pictures?
07-11-2010, 04:23 PM
#3
Advanced
Thread Starter
How did your installation go? I've got the one piece molding but have not installed it yet on my '99. If yours was like mine, it was starting to split and separate at the corners. Any special tools (roller, etc) involved? Did you use any sealant (either silicone or urethane) in addition to the molding? I've had no water leaks, but it sure looks unsightly where those small separations are.
Any pictures?
Any pictures?
took awhile, but went well. In the big gap areas, it slips right in. In the narrow gap, it had to be forced with the screwdriver or the allen wrench, first on the lip adjacent to the glass, then from the backside away from the glass, then on the exposed surface.
took about an hour total.
Last edited by 5.0 RACER; 07-11-2010 at 04:55 PM.
07-11-2010, 04:42 PM
#4
Team Owner
forgot to take pictures. I'll see if I can mock any up.
took awhile, but went well. In the big gap areas, it slips right in. In the narrow gap, it had to be forced with the screwdriver or the allen wrench, first on the lip adjacent to the glass, tne from the backside away from the glass, then on the exposed surface.
took about an hour total.
took awhile, but went well. In the big gap areas, it slips right in. In the narrow gap, it had to be forced with the screwdriver or the allen wrench, first on the lip adjacent to the glass, tne from the backside away from the glass, then on the exposed surface.
took about an hour total.
07-11-2010, 04:53 PM
#5
Advanced
Thread Starter

you can see the channel the glass fits into. The lower part of the molding must fit under the glass.
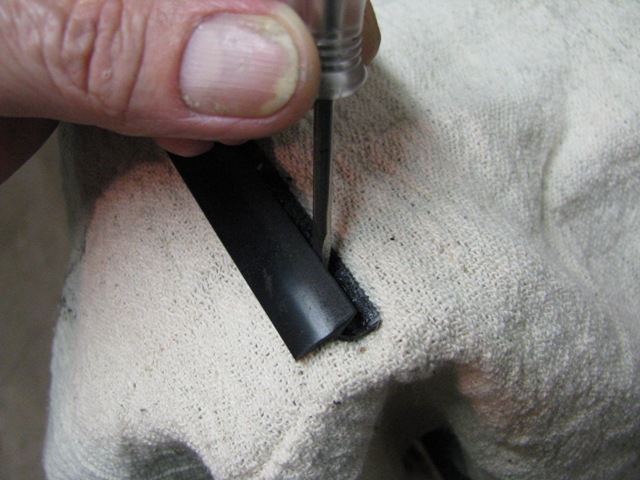
I used a screwdriver to force the lip under the glass
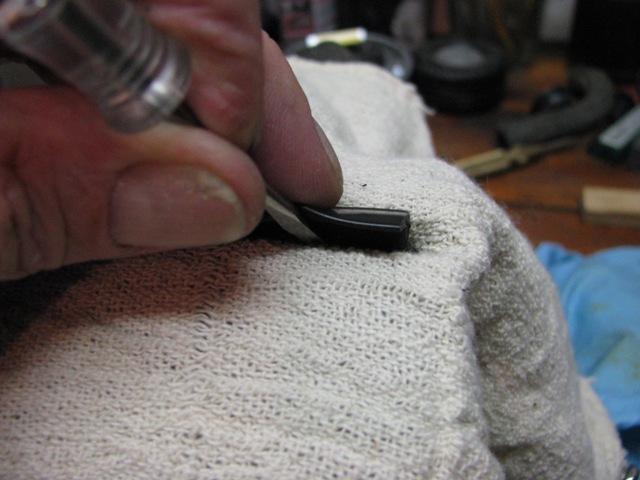
Then from the backside, I pushed the rest of the molding into the groove

then pushed the exposed surface to ensure it was seated into the groove.
Looks good!
 07-11-2010, 04:54 PM
#6
Advanced
Thread Starter
Start in the corners and work to the center
do not stretch it. allow it to fall to its location. otherwise you will have more molding than groove to install it into. I used blue painter's tape to hold the molding along the groove I was going to install it in to across the top while I worked the bottm. Then I moved tothe top, which was easier because the gap was wider. I suspect because the glass "sagged" a bit over the years, making the bottom groove smaller.
Last edited by 5.0 RACER; 08-26-2010 at 06:08 PM. Reason: add more info
07-14-2010, 05:13 PM
#7
Resident moron


Thanks for the guide. I have a 99 FRC too and the corners of the molding literally have a 1" or more gap now due to shrinkage. I was figuring on replacing it this summer and I just ordered the part # in your post 
Dope
Dope
 07-14-2010, 06:40 PM
#9
Advanced
Thread Starter
I was a bit apprehensive as I could not find any article on performing this. But other than the sore fingers from the pushing of the screwdriver/allen wrench, it was painless. Quite literally, just pull the old stuff out. Clean the groove and all the old adhesive (well, MOST of it anyways. I left some in the groove on the glass.)
I found laying across the rear deck of the car gave me good access to the lower part of the glass while installing the molding. I had to stay close to it to see when I got the lower lip under the glass, like nose-to-the-grindstone close. Then push the backside into place, and shift back to the front/lower lip. Back and forth working it in inch by inch.
Where the gap between the edge of the glass and the body is wider, it goes in MUCH easier. My glass had a narrower gap at the bottom than the top as I expect the glass has "sagged" a bit over the years. I did NOT try to push it up; worried about breaking it. The top of the glass went quickly because of the wider gap.
I switched between a screwdriver and a small allen. The screwdriver can cut the rubber but can get into narrow areas, where the flat bottom of the allen didn't cut, but pushed nicely. Other flat items might work better, but I was on a roll.
The adhesive was messy, but cleaned up nicely with Tar & Bug Cleaner, or laquer thinner. Watch the thinner as it will attack finishes, but not glass.
08-21-2010, 03:22 AM
#10

Tried this on my '04, some parts of it were pretty much impossible to get in. I got about 1/5th of it in before giving up. Killed my hands/fingers in the process. I can only assume that a glass shop would put on the molding before gluing in the glass, cause installing it in this way seems seriously insane.
08-21-2010, 01:42 PM
#11
XX

Interesting, getting ready for fresh paint but didn't want to yank the glass out. May give this a try and if it doesn't work out cost to remove and install back glass is $125.
08-23-2010, 08:53 PM
#12
Advanced
Thread Starter
Tried this on my '04, some parts of it were pretty much impossible to get in. I got about 1/5th of it in before giving up. Killed my hands/fingers in the process. I can only assume that a glass shop would put on the molding before gluing in the glass, cause installing it in this way seems seriously insane.
08-26-2010, 05:47 PM
#13
I'd gladly pay $125, but every glass shop I've checked with so far refuses to remove perfectly good glass (unless I'm going to have a new one installed I guess?) Not really sure who to even go to for this now, maybe the dealer is the only choice, or a body shop. Or I may give it another try on my own w/o removing the glass.
Last edited by Fireblade; 08-26-2010 at 05:51 PM.

The following users liked this post:
Torch Red Fire 21 (03-03-2024)
10-23-2013, 09:18 PM
#15
Advanced
Thread Starter