
[Z06] Wheel well fading
 09-02-2011, 09:12 AM
#1
Burning Brakes

Thread Starter
Member Since: Mar 2007
Posts: 763
Likes: 0
Received 0 Likes
on
0 Posts

My front wheel wells are pretty faded. I'm thinking of spraying them flat black, anyone else run into this yet?
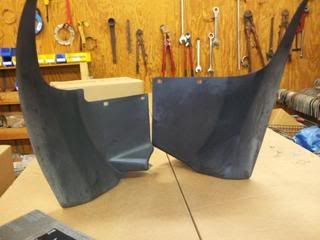
EDIT: So I finished this project and thought I'd post pics. Pretty easy job. First, you will need to remove the old plastic. Taking the wheels off is not necessary, just jack the correponding wheel to which you are working on up and that slack in the suspension should provide adequate space to remove the plastic. There are six fasteners in each pece. Both pieces will have two push pins in the wheel well, and four bolts underneath. I use diagonal cutters to GENTLY grip the pins and pull out with, the other bolts underneath will include two 7mm head screws and two 10mm head bolts. Once you have removed the fasteners, gently work the plastic away from the fender starting from the bottom and working your way up, there are four or five clips holding it in place and thats pretty much it. I apologize for not having pictures of the removal or installation method, it isn't difficult IMO even for a novice. Reinstallation is the reverse order of removal, again, nothing tricky here.
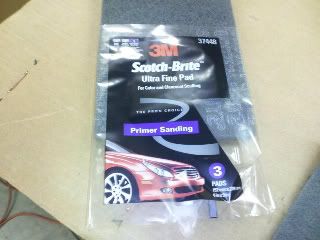
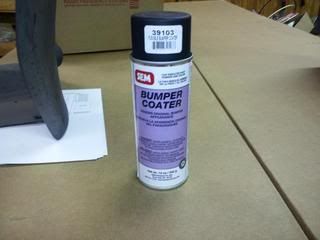
Products you will need
you will also need some acetone, the wife or significant other or the neighborhood hussy can help you here if you don't have any laying around (nail polish remover)
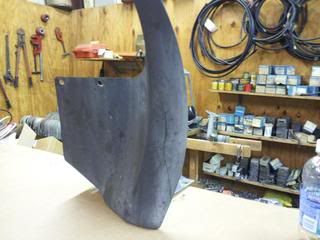
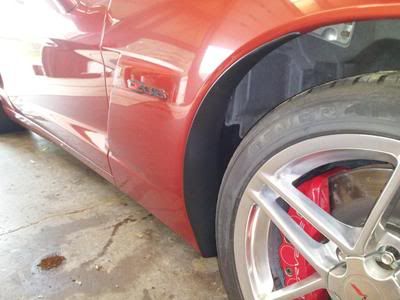
This is my driver side. Now you guys see why I went to such lengths...
The passenger side wasnt much better
So i scuffed them up with the Scotchbrite and then wiped them down with acetone and let them dry off for a little.
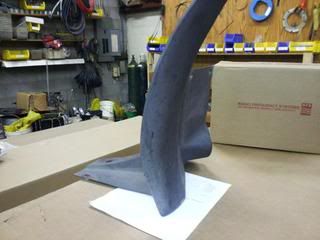
This is what they looked like prepped
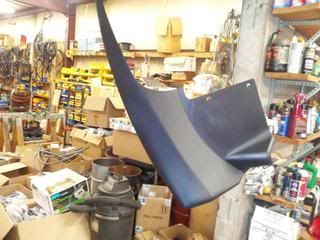
I sprayed a few coats of paint and kept getting blotchy white spots (most likely due to shotty prep work)
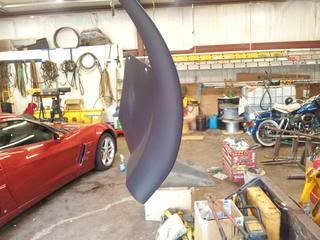
I let them cure for two days and i scuffed them down again and resprayed. This time I got the desired effect. (note the apsis emblems that the other person who lives in my house bought for me at carlisle )
)
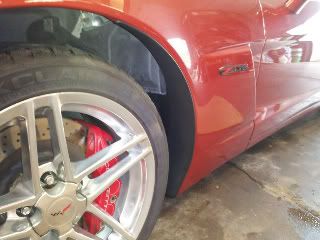
I'm happy. It's an improvement.

EDIT: So I finished this project and thought I'd post pics. Pretty easy job. First, you will need to remove the old plastic. Taking the wheels off is not necessary, just jack the correponding wheel to which you are working on up and that slack in the suspension should provide adequate space to remove the plastic. There are six fasteners in each pece. Both pieces will have two push pins in the wheel well, and four bolts underneath. I use diagonal cutters to GENTLY grip the pins and pull out with, the other bolts underneath will include two 7mm head screws and two 10mm head bolts. Once you have removed the fasteners, gently work the plastic away from the fender starting from the bottom and working your way up, there are four or five clips holding it in place and thats pretty much it. I apologize for not having pictures of the removal or installation method, it isn't difficult IMO even for a novice. Reinstallation is the reverse order of removal, again, nothing tricky here.
Products you will need
you will also need some acetone, the wife or significant other or the neighborhood hussy can help you here if you don't have any laying around (nail polish remover)
This is my driver side. Now you guys see why I went to such lengths...
The passenger side wasnt much better
So i scuffed them up with the Scotchbrite and then wiped them down with acetone and let them dry off for a little.
This is what they looked like prepped
I sprayed a few coats of paint and kept getting blotchy white spots (most likely due to shotty prep work)
I let them cure for two days and i scuffed them down again and resprayed. This time I got the desired effect. (note the apsis emblems that the other person who lives in my house bought for me at carlisle
)I'm happy. It's an improvement.
Last edited by Greenstealth; 09-06-2011 at 03:13 PM.


 09-02-2011, 10:09 AM
#3
Race Director


Another product called Back to Black.
09-02-2011, 10:27 AM
#4
Burning Brakes
Or you can just remove the paint from the inside of the barrel. Much easier to wipe the brake dust out than trying to keep the gray paint looking good.
http://forums.corvetteforum.com/c6-z...me-wheels.html
http://forums.corvetteforum.com/c6-z...me-wheels.html
09-02-2011, 01:18 PM
#5
Le Mans Master


+ 1 Mother's brand name - Back to Black.
Try that first. Might even be available at WalMart.
I am not a fan of your painting idea.... plastic wells can flex, chipping, flaking issues.
Try that first. Might even be available at WalMart.
I am not a fan of your painting idea.... plastic wells can flex, chipping, flaking issues.
09-02-2011, 02:00 PM
#7
Le Mans Master


Member Since: Dec 2004
Location: AZ
Posts: 5,756
Received 539 Likes
on
280 Posts
St. Jude Donor '06-'08-'10-'11-'12-'13 '14-'15-'16-'17-'18-'19

Or you can just remove the paint from the inside of the barrel. Much easier to wipe the brake dust out than trying to keep the gray paint looking good.
http://forums.corvetteforum.com/c6-z...me-wheels.html
http://forums.corvetteforum.com/c6-z...me-wheels.html
09-02-2011, 05:24 PM
#8
Melting Slicks

Mine were getting pretty bad too, with a lot of scuff marks (62k miles now). So I just ended up getting new wheel well liners - but don't get them from a dealer! You can get them for a little over half the cost of what a dealer will charge you at gmpartsdirect.com.
09-02-2011, 06:15 PM
#9
Burning Brakes
Thread Starter
Member Since: Mar 2007
Posts: 763
Likes: 0
Received 0 Likes
on
0 Posts
I would consider the back to black idea (i have it and I know how well it works) but they are faded to a smoke color. I bought some flat black bumper paint (made to flex). I'll see I can get some pics and chronicle the journey.


 09-03-2011, 09:19 AM
#13
Le Mans Master
Member Since: Dec 2004
Location: AZ
Posts: 5,756
Received 539 Likes
on
280 Posts
St. Jude Donor '06-'08-'10-'11-'12-'13 '14-'15-'16-'17-'18-'19
My secret is Stoners "More Shine" tire dressing, lightly applied, allowed to sit for a minute or two then wiped off. Works great.
09-03-2011, 01:43 PM
#14
Le Mans Master
I was thinking when mine get to a point of looking faded, I would use a krylon paint made specifically for painting vinyl or plastic surfaces. Its about 10 bucks for a spray bomb of it. You could try that first, then if that does not give the desired look you can spring for some new ones.
Good luck and post some before and after pictures. Would like to hear what you finally do.


 09-04-2011, 09:04 PM
#17
Burning Brakes
Thread Starter
Member Since: Mar 2007
Posts: 763
Likes: 0
Received 0 Likes
on
0 Posts
I scuffed them up with some 3m brillo stuff, wiped them down with acetone and sprayed them with flat black bumper spray. They didn't come out perfect, definitely improved but not exactly what I was looking for. There were some light spots. I think this was most likely due to my prep. I'm going to sand them down with 400 and respray. I'll try to get some pics up.
