Black 1996 C4 Vette paint restoration
 12-04-2009, 06:43 AM
#1
Supporting Vendor
Thread Starter
When I performed the initial inspection on this Corvette, I knew right away that it was going to experience a remarkable transformation. While readers always enjoy seeing amazing shots of beautiful Exotic vehicles, the ones with the unbelievable before and after shots always get the most attention.
1996 was the last year of the C4 generation Corvette (1984-1996), and the current owner just recently purchased it with 28K miles on the clock with plans to recondition it to as close to new as possible. He ordered a brand new set of wheels and tires (that didn�t arrive before I worked on it), he was having me recondition the paint, and then over the winter he is working on a big sound deadening/stereo install as well. Once he has completed the project it will be one of the nicest C4 drivers around!
As you will see from the photos below, the car had a severe case of swirls and deep, long scratches in the very hard Corvette clear coat. I knew that it was going to require a tremendous amount of work, but it would look stunning once properly leveled and polished out. We opted against a lot of wetsanding, and knew that it could only be brought back to about 90% of new without it, but at that rate it would still look better than most vehicles on the road. You can quickly achieve a point of diminishing returns on paint correction, so it is important to establish goals and expectations with the customer, as well as the budget that they have to work within. A 90% correction on this was 17 hours� worth, whereas a 98%-100% could have taken 30+ hours.
Now that we�ve established a bit of history as well as goals, let�s go through the inspection to see what we have to work with.
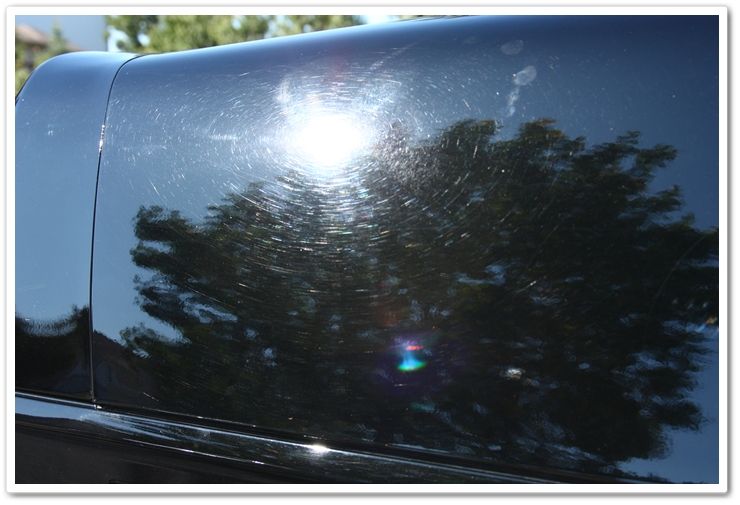
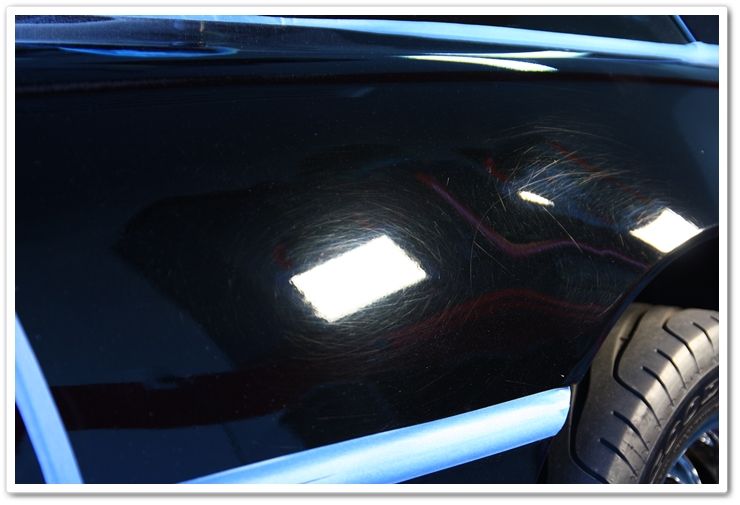
When you have a black car with a notoriously hard clear coat like the Corvette, and it pulls up looking like this, you know you have some overtime to work! Swirls this severe will hide the true color (especially on black), and in this case they made the car look charcoal-grey.
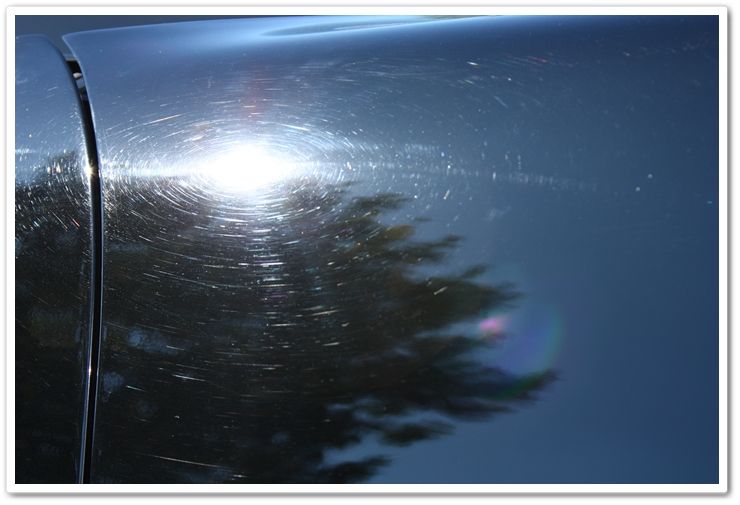
There were holograms mixed throughout as well.
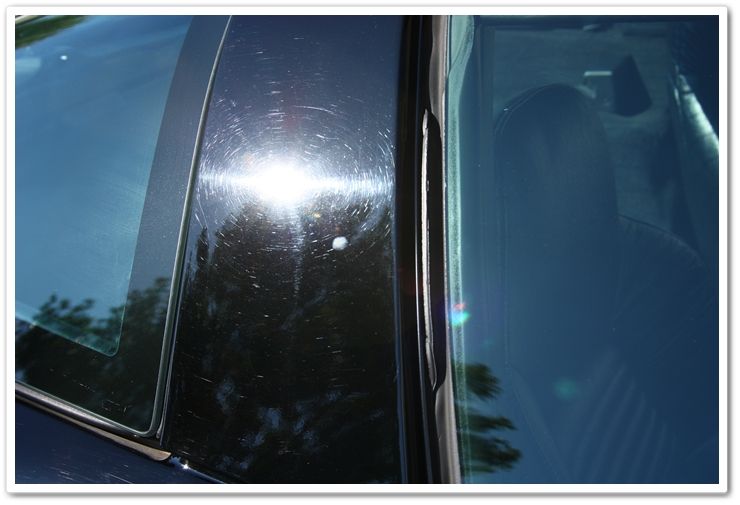
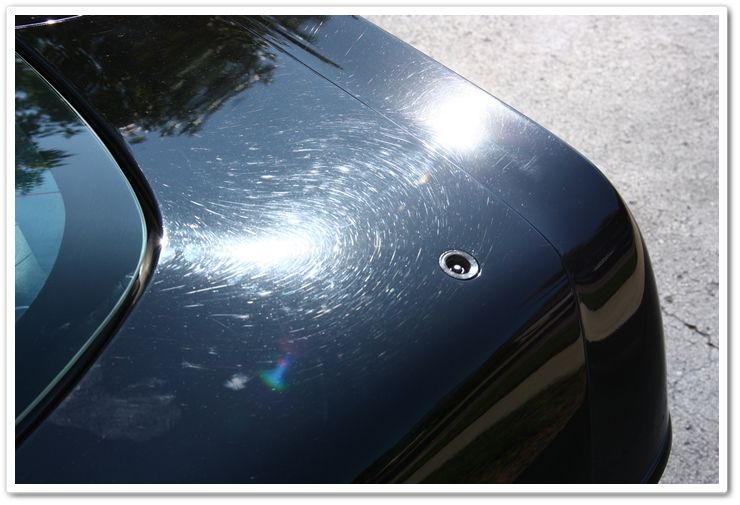
Here you can see where somebody tried to spot-fix a problem, and did more damage than good. Look at the hazy spot in the center of the photo.

The hood was exceptionally bad. You can tell where somebody had attempted to polish the hood in the past, but gave up�leaving a hazy finish. This area would require more work than the rest!
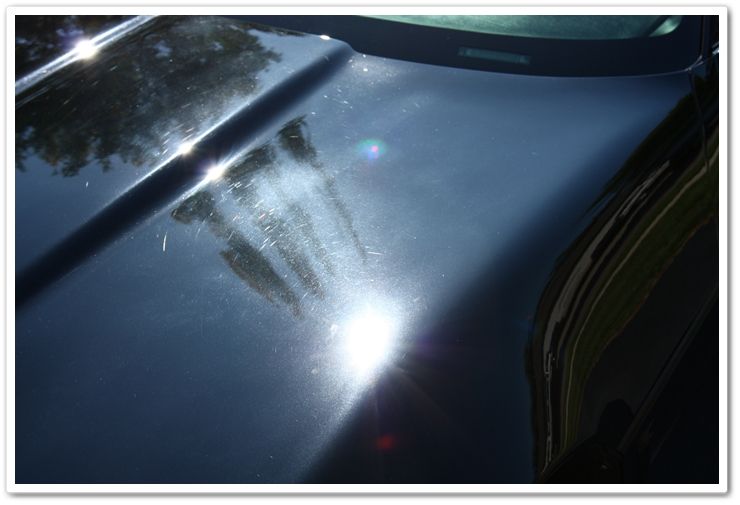

So now you have a good idea of the amount of work that lies ahead.
1996 was the last year of the C4 generation Corvette (1984-1996), and the current owner just recently purchased it with 28K miles on the clock with plans to recondition it to as close to new as possible. He ordered a brand new set of wheels and tires (that didn�t arrive before I worked on it), he was having me recondition the paint, and then over the winter he is working on a big sound deadening/stereo install as well. Once he has completed the project it will be one of the nicest C4 drivers around!
As you will see from the photos below, the car had a severe case of swirls and deep, long scratches in the very hard Corvette clear coat. I knew that it was going to require a tremendous amount of work, but it would look stunning once properly leveled and polished out. We opted against a lot of wetsanding, and knew that it could only be brought back to about 90% of new without it, but at that rate it would still look better than most vehicles on the road. You can quickly achieve a point of diminishing returns on paint correction, so it is important to establish goals and expectations with the customer, as well as the budget that they have to work within. A 90% correction on this was 17 hours� worth, whereas a 98%-100% could have taken 30+ hours.
Now that we�ve established a bit of history as well as goals, let�s go through the inspection to see what we have to work with.
When you have a black car with a notoriously hard clear coat like the Corvette, and it pulls up looking like this, you know you have some overtime to work! Swirls this severe will hide the true color (especially on black), and in this case they made the car look charcoal-grey.
There were holograms mixed throughout as well.
Here you can see where somebody tried to spot-fix a problem, and did more damage than good. Look at the hazy spot in the center of the photo.
The hood was exceptionally bad. You can tell where somebody had attempted to polish the hood in the past, but gave up�leaving a hazy finish. This area would require more work than the rest!
So now you have a good idea of the amount of work that lies ahead.
 12-04-2009, 06:44 AM
#2
Supporting Vendor
Thread Starter
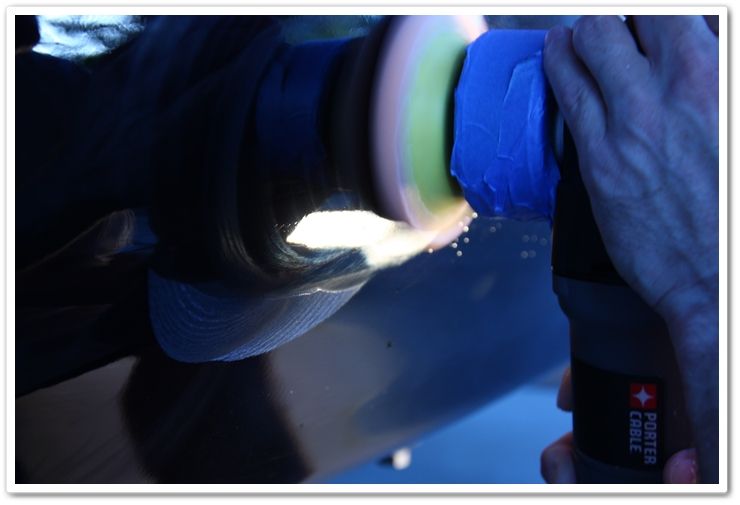
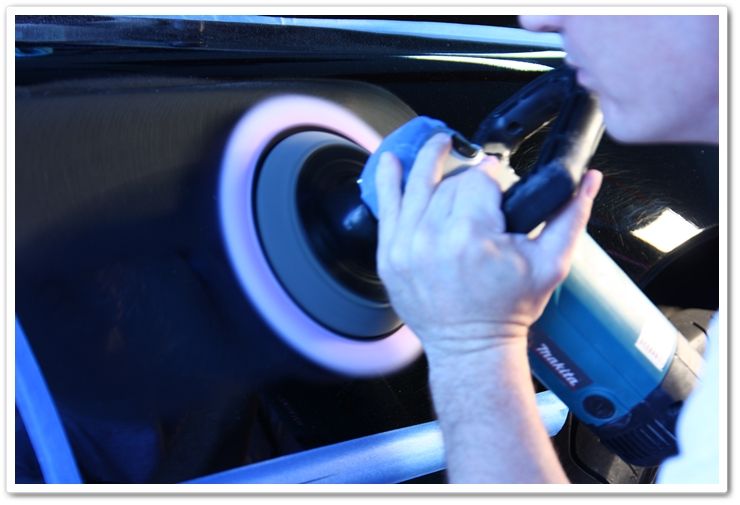
I prepped the Vette for surgery (wash, clay, tape), and proceeded with a heavy combination of Megs 105 and LC Purple Foamed Wool pads on the Makita rotary. I tried a few lighter combinations first, but they simply weren�t cutting the defects well enough. Despite the fact that I was using a heavy cut combination during the compounding stage, the hard Corvette clear wasn�t giving in easily! Many areas required 3-4 passes before I could move on to the next stage.
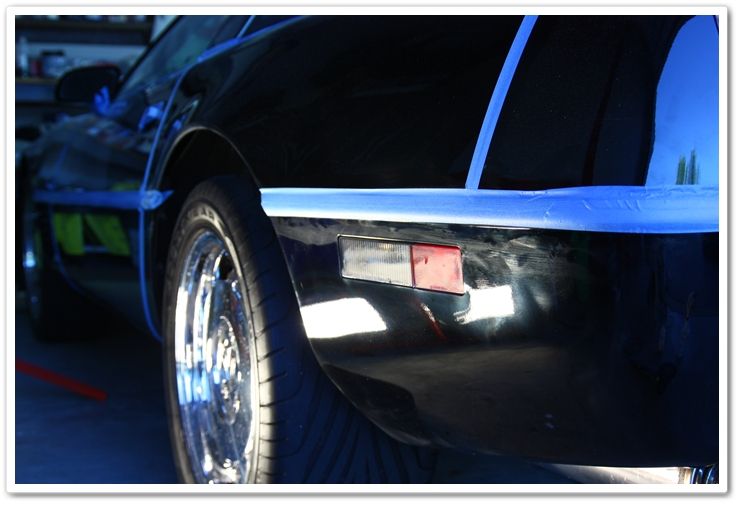
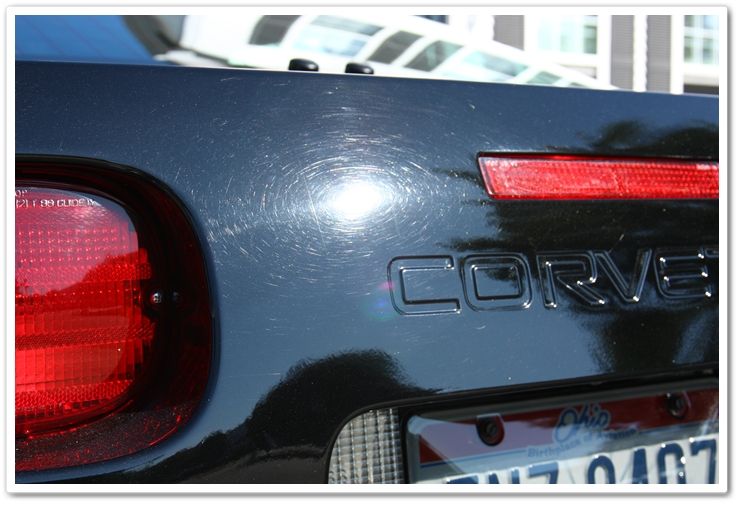
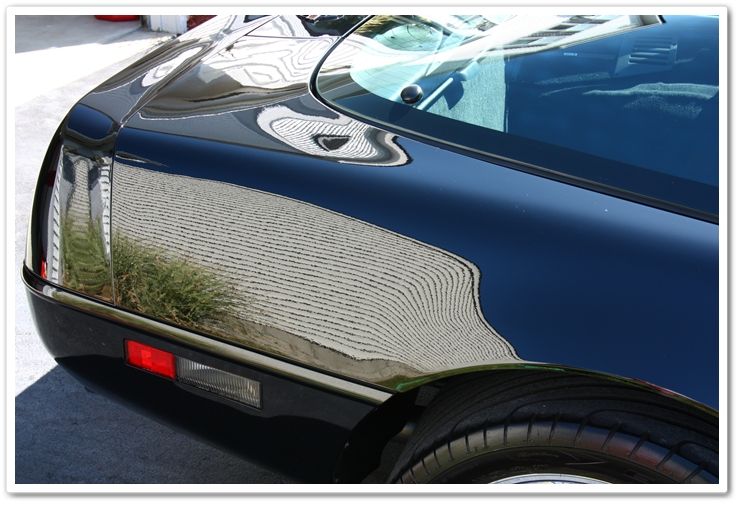
For the plastic back end of the vehicle, I used my PCXP with an orange pad and Megs 105. This combination did a good job of cleaning up the defects.
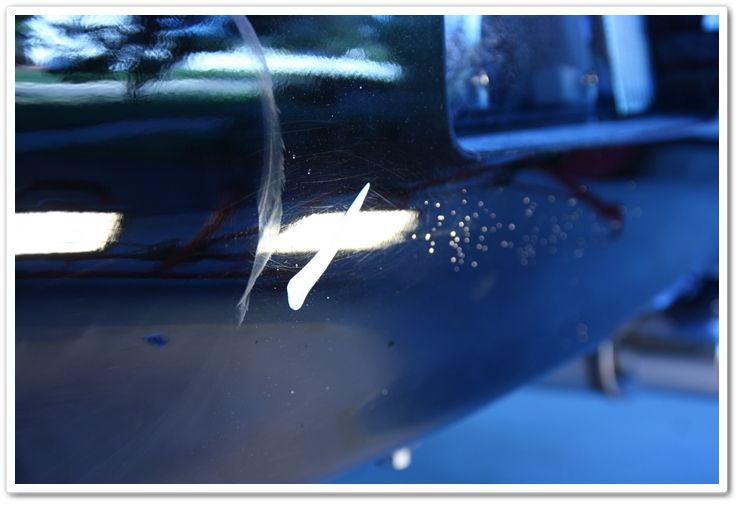
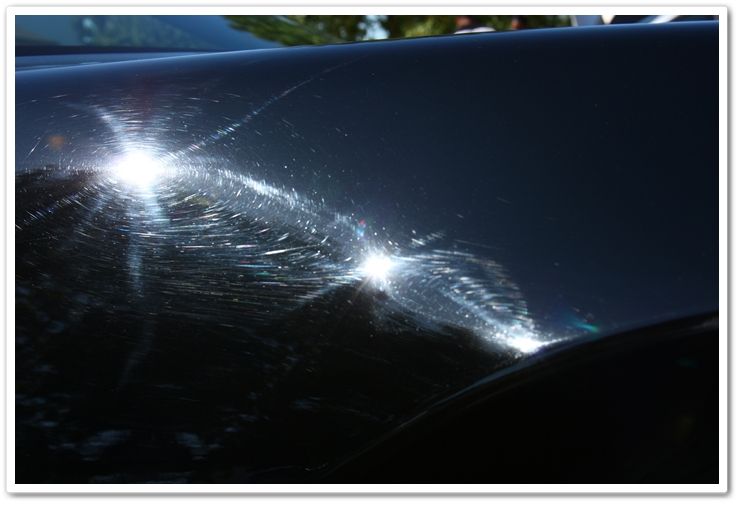
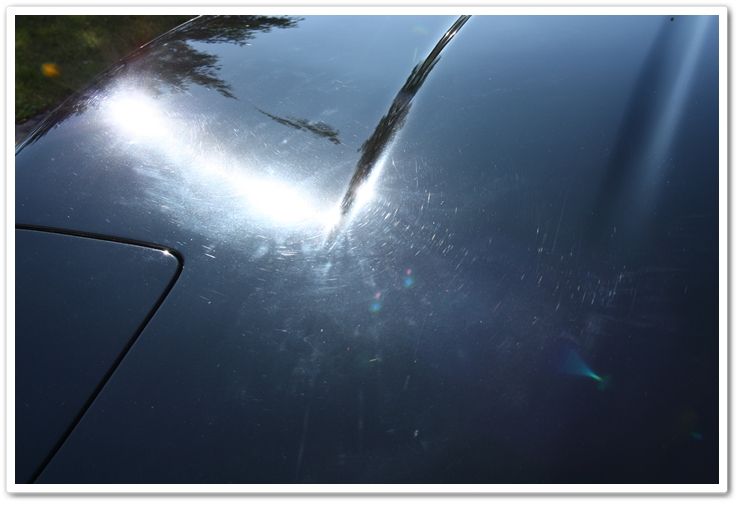
If you look closely you can see some sizable scratches mixed in with the swirls. The whole car was covered in these.
I hit this section 3 or 4 times with PFW/105 to clean it all up (sorry for the fuzzy photo)
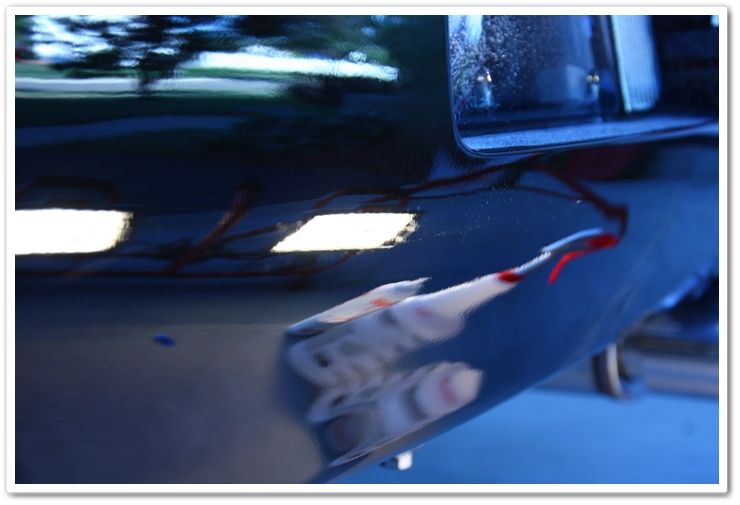
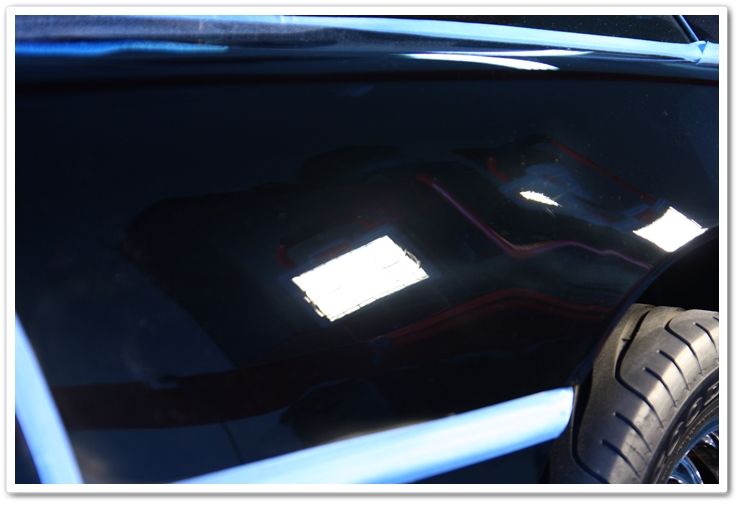
After compounding, you can tell that the color has been restored already. Clarity will be brought out when I come back around for finish polishing.
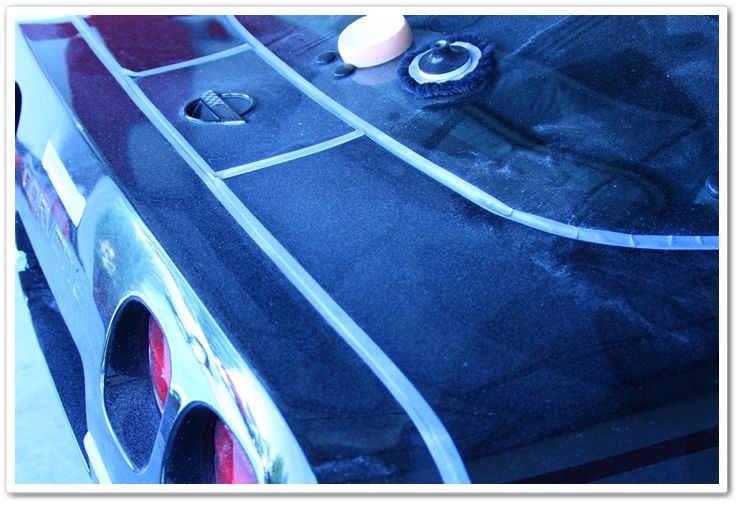
Megs 105 around a lot of taped edges means dust�lots of dust!
Once I was finished with the compounding stage, I washed the car again to remove all of the dust and carrier oils and got it ready for polishing.
For the next stage, I used Menzerna Power Finish on a white pad with the Makita rotary. Power Finish provides almost as much cut as SIP, and does a tremendous job of restoring clarity on the hard Corvette clear. Since it finishes down almost as fine as 106FA, having it combined with a white polishing pad left the finish LSP ready. If it were softer black paint however, I would have finished it down with 106FA instead.
Since the hood was in such bad condition, I went with a slightly different combination. After compounding with M105/PFW, I went with SIP/orange pad, then 106FA/white pad. Since I wanted to extract as much gloss as possible out of it, I then finished it up with PO85RD and a blue pad.
Here�s a peak at the hood when I took it outside for an inspection after the 106FF/white combination. Don�t worry about the polish smudges�I haven�t gone through the cleanup stage yet.
After all the polishing was complete, I wiped it all down (again) with IPA, did all of the finishing touches, applied a coat of Optimum Opti-Seal, and then buffed it out with Optimum Spray Wax.
For the plastic back end of the vehicle, I used my PCXP with an orange pad and Megs 105. This combination did a good job of cleaning up the defects.
If you look closely you can see some sizable scratches mixed in with the swirls. The whole car was covered in these.
I hit this section 3 or 4 times with PFW/105 to clean it all up (sorry for the fuzzy photo)
After compounding, you can tell that the color has been restored already. Clarity will be brought out when I come back around for finish polishing.
Megs 105 around a lot of taped edges means dust�lots of dust!
Once I was finished with the compounding stage, I washed the car again to remove all of the dust and carrier oils and got it ready for polishing.
For the next stage, I used Menzerna Power Finish on a white pad with the Makita rotary. Power Finish provides almost as much cut as SIP, and does a tremendous job of restoring clarity on the hard Corvette clear. Since it finishes down almost as fine as 106FA, having it combined with a white polishing pad left the finish LSP ready. If it were softer black paint however, I would have finished it down with 106FA instead.
Since the hood was in such bad condition, I went with a slightly different combination. After compounding with M105/PFW, I went with SIP/orange pad, then 106FA/white pad. Since I wanted to extract as much gloss as possible out of it, I then finished it up with PO85RD and a blue pad.
Here�s a peak at the hood when I took it outside for an inspection after the 106FF/white combination. Don�t worry about the polish smudges�I haven�t gone through the cleanup stage yet.
After all the polishing was complete, I wiped it all down (again) with IPA, did all of the finishing touches, applied a coat of Optimum Opti-Seal, and then buffed it out with Optimum Spray Wax.
12-04-2009, 06:45 AM
#3
Supporting Vendor
Thread Starter
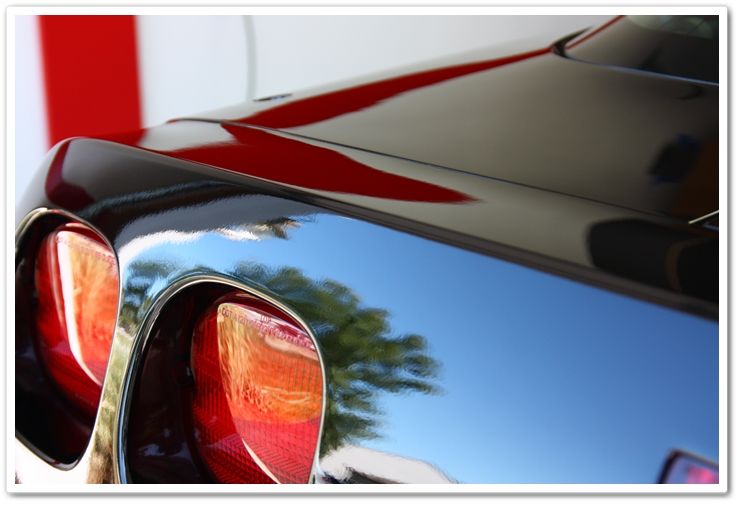
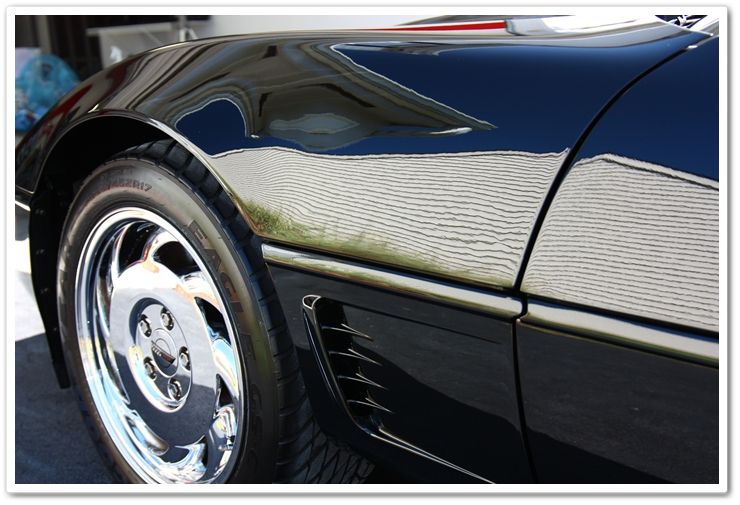
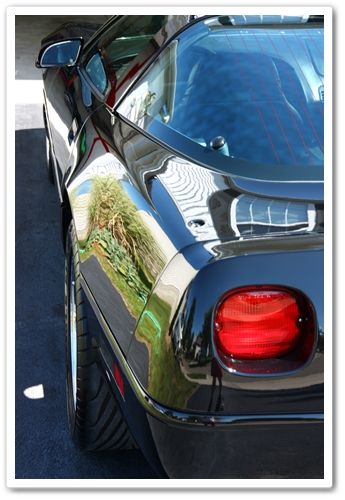
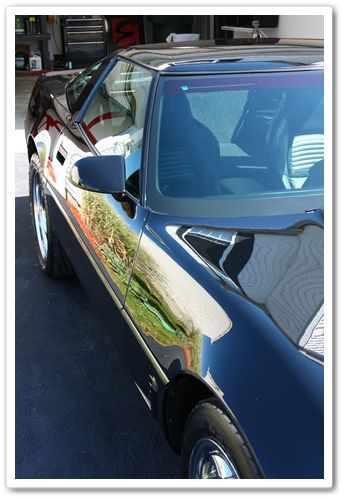
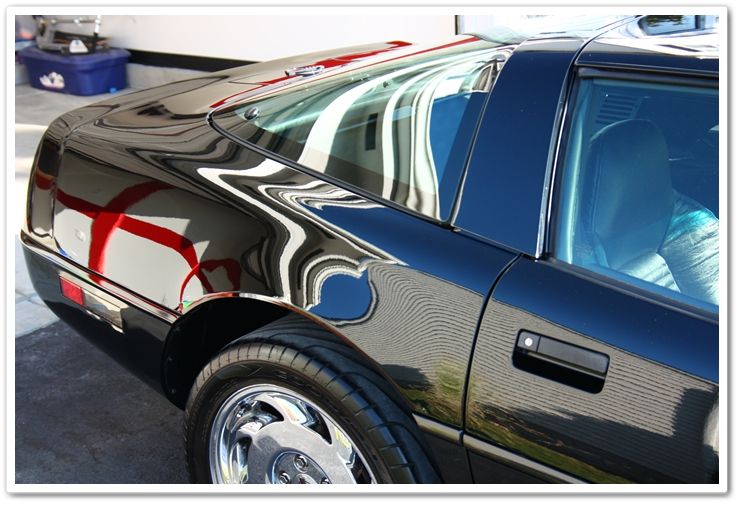
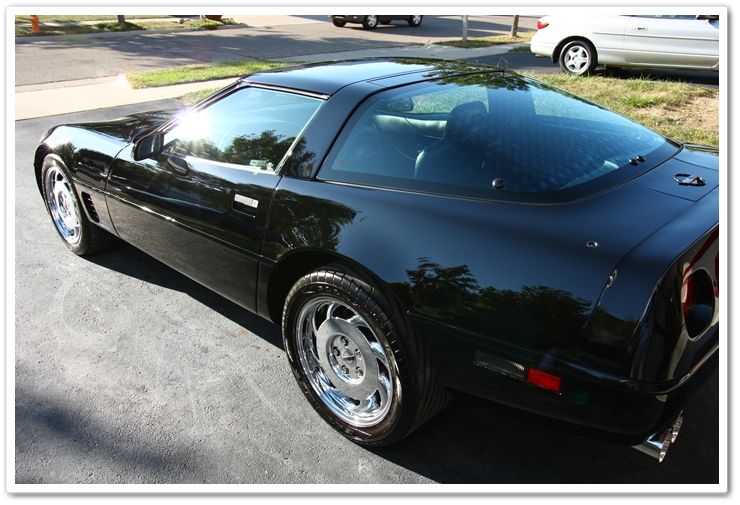
Are you ready to see the transformation? On a few of these I�ll take you back to what it looked like before so you can get a real appreciation for the change.
Before:
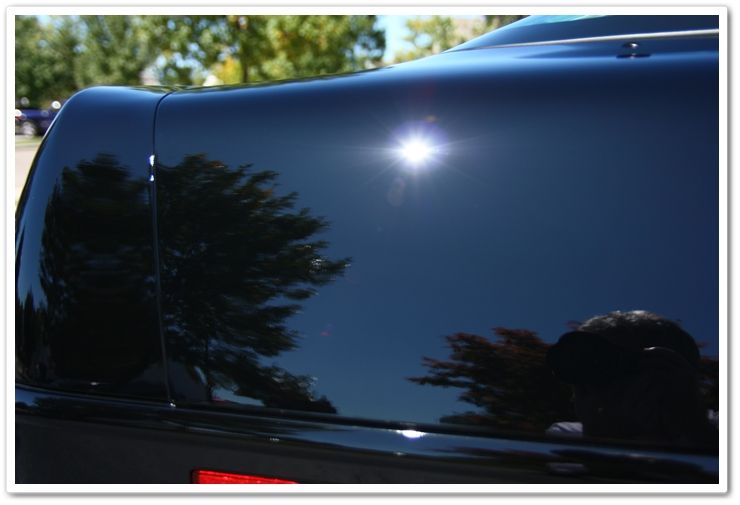
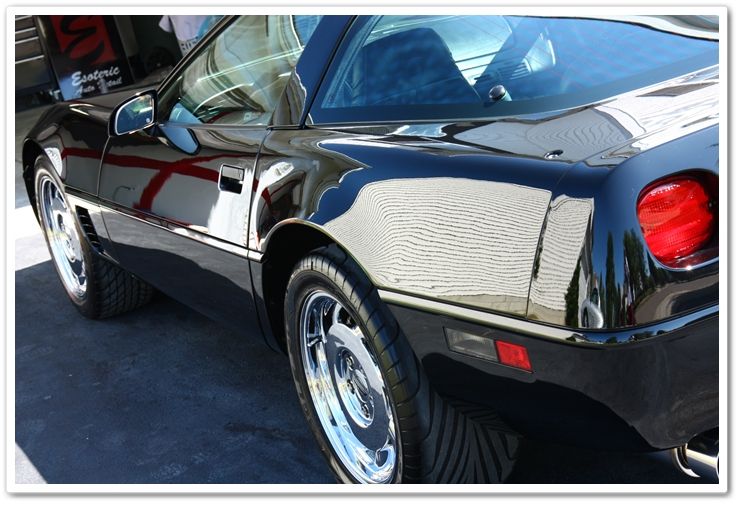
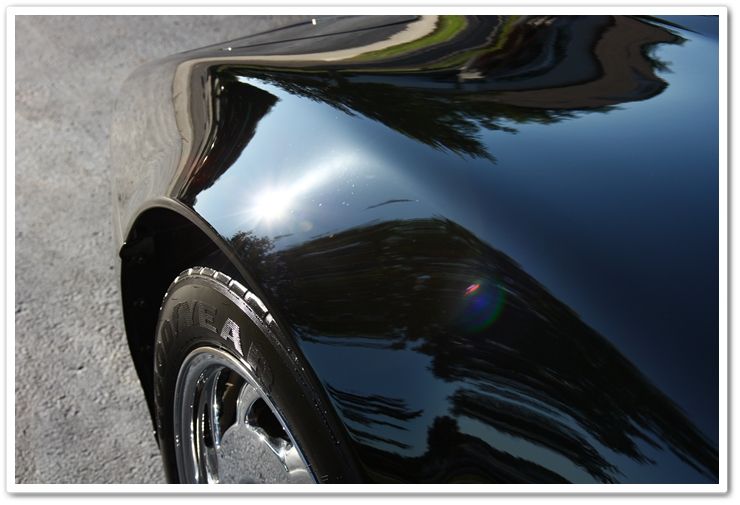
After:
Before:
After:
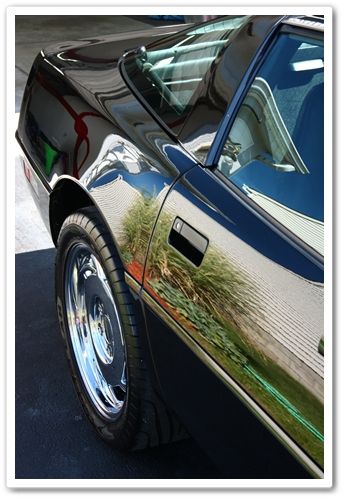
Before:
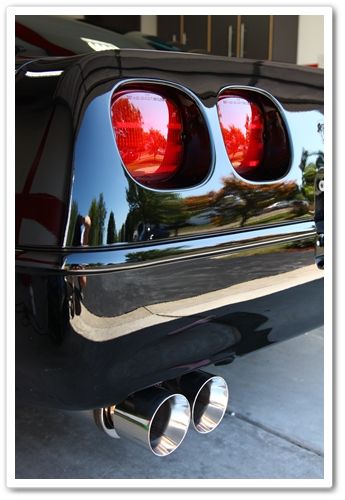
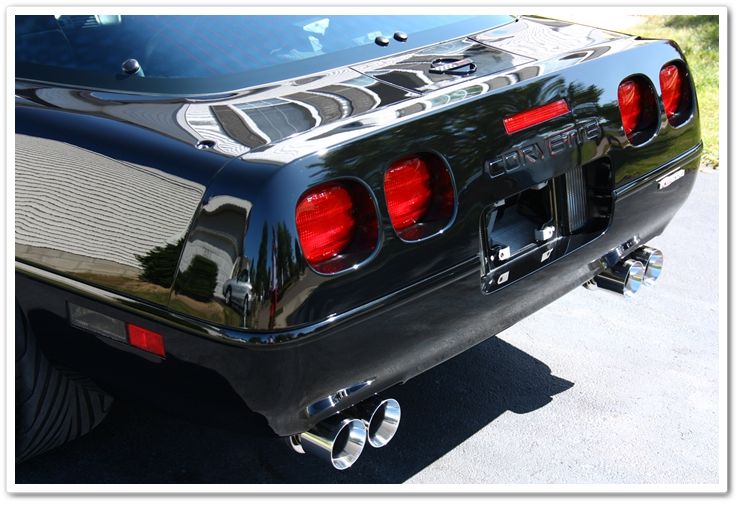
After: Look at the difference in color!
Exhaust tips were polished with Optimum Metal Polish
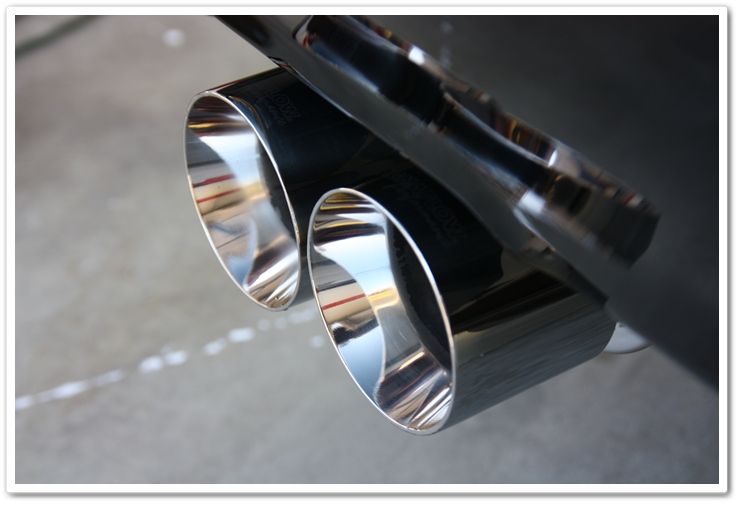
I�m going to get a bit carried away with some of these photos, but I think you�re going to enjoy them all�
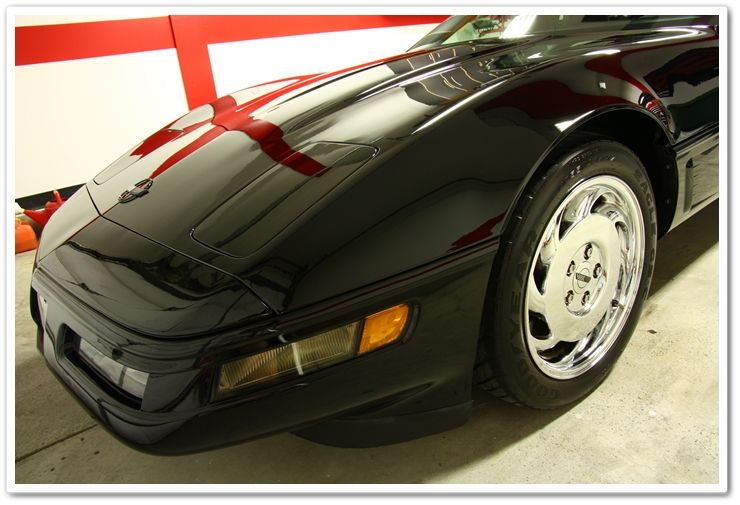
Before:
After:
Before:
After:
Before:
After: Look at the difference in color!
Exhaust tips were polished with Optimum Metal Polish
I�m going to get a bit carried away with some of these photos, but I think you�re going to enjoy them all�
12-04-2009, 06:46 AM
#4
Supporting Vendor
Thread Starter
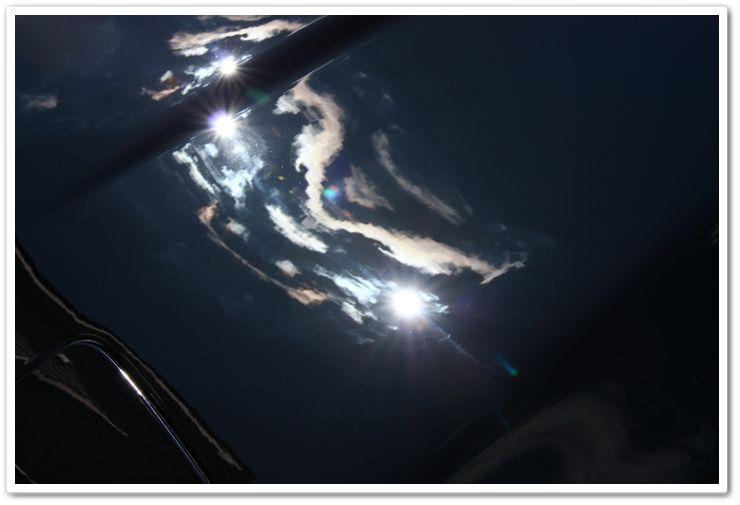
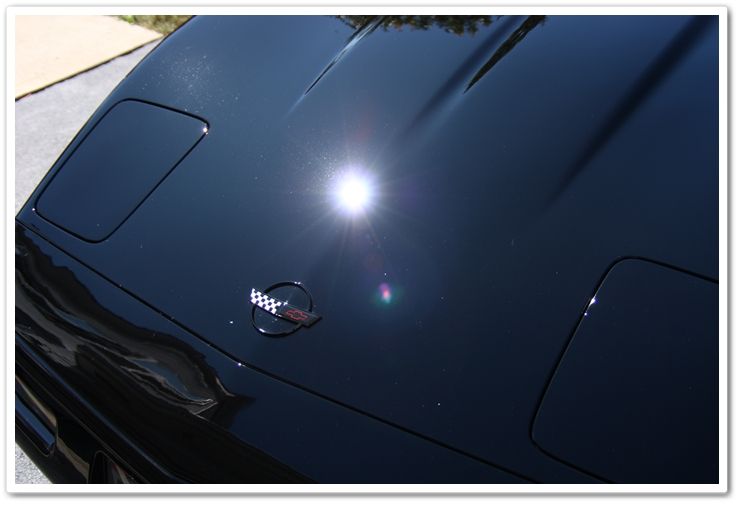
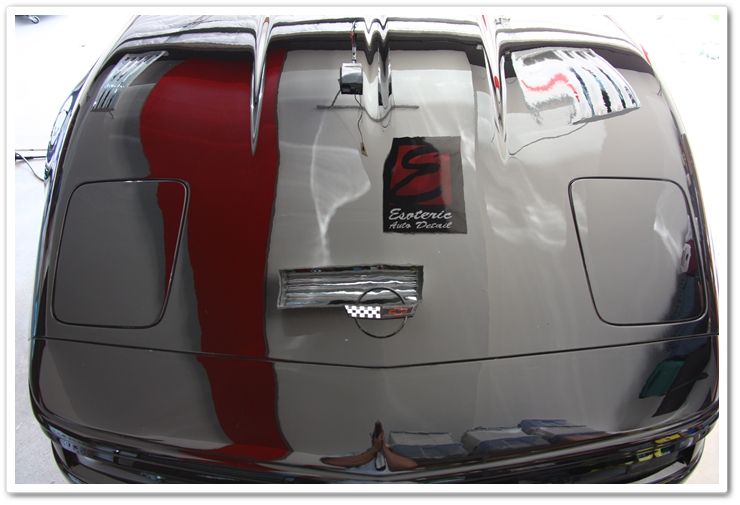
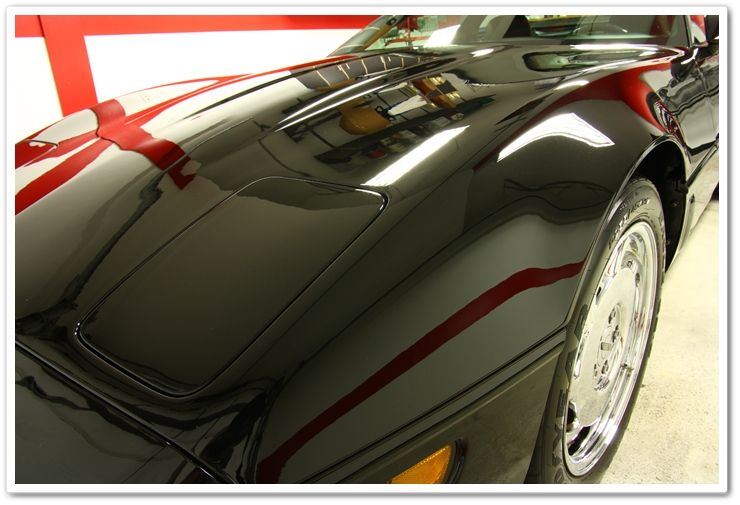
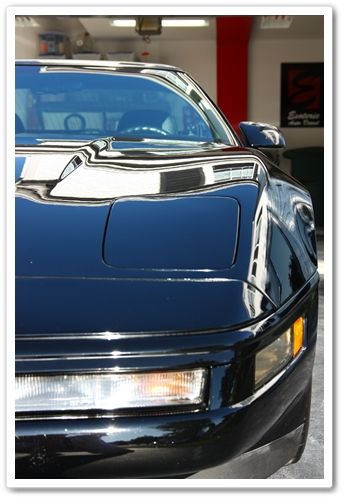
Remember how hazy the hood looked when we received it? Does this look just a little bit better?
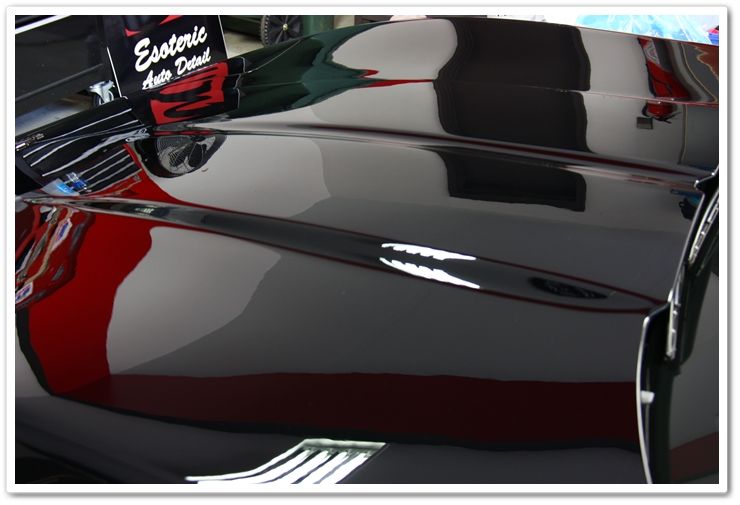
This one might be my favorite shot of all�just like glass!


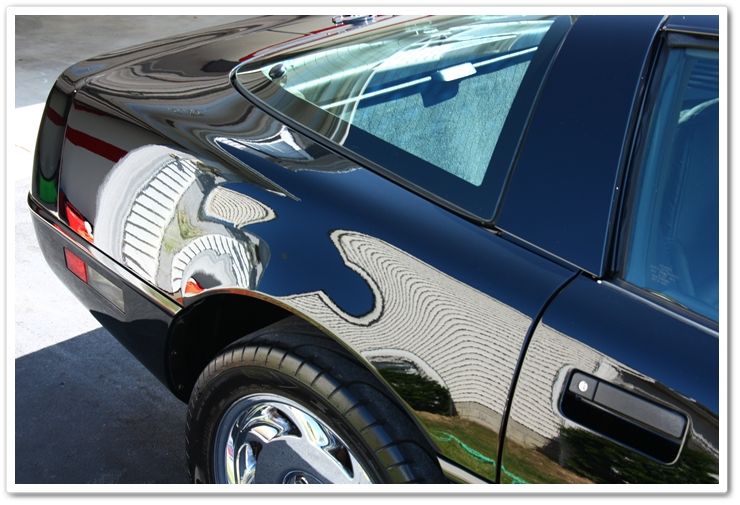
This one might be my favorite shot of all�just like glass!
12-04-2009, 06:47 AM
#5
Supporting Vendor
Thread Starter
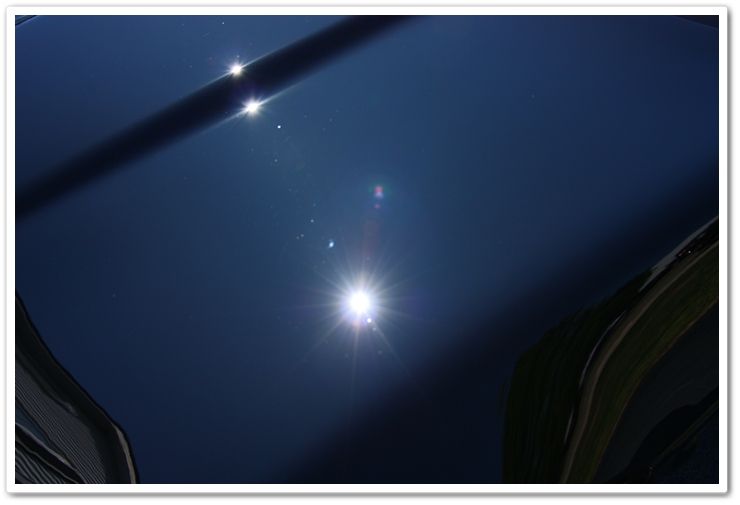
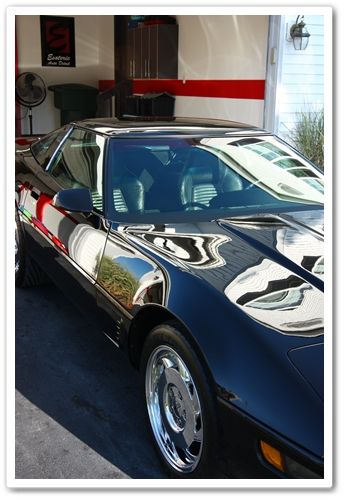
I wanted to take a few moody shots, so I pulled it back in the garage and liked what I came up with.
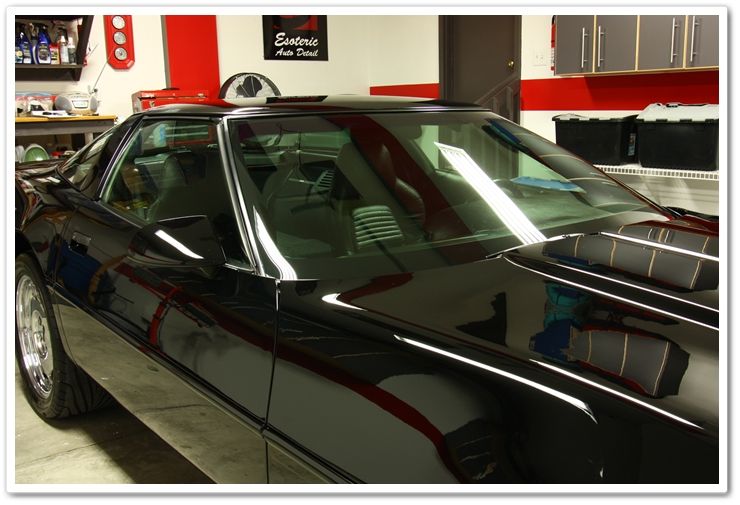
And the last few�
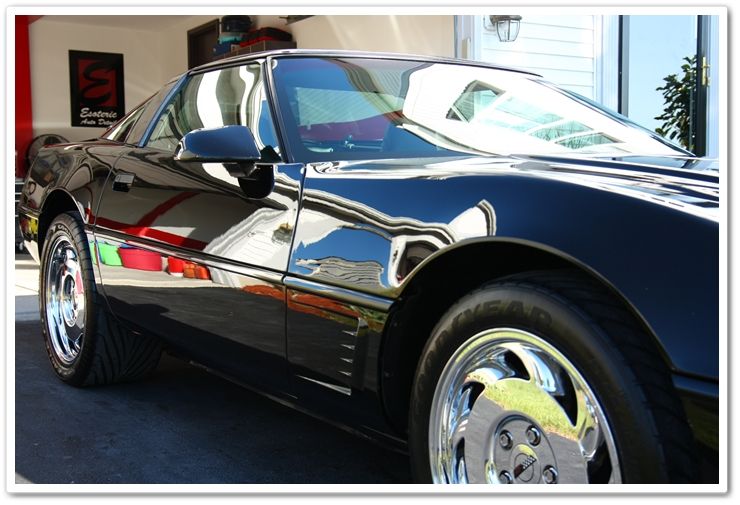
The owner was absolutely floored by the results, and after spending some time teaching him about the after-care of his new Vette, he looks forward to keeping it looking this nice for many years to come.
Thanks for taking the time to review my work. Total time on this exterior-only job = 17 hours.
All products supplied by Detailed Image!
12-04-2009, 08:35 AM
#6
Race Director


Member Since: Oct 2004
Location: Cape Cod, Mass.
Posts: 18,813
Received 4,643 Likes
on
2,192 Posts
2023 C3 of the Year Finalist - Unmodified
2021 C8 of the Year Finalist Unmodified
2020 Corvette of the Year Finalist (performance mods)
2019 C1 of Year Winner (performance mods)
2017 Corvette of the Year Finalist
2016 C2 of Year
2015 C3 of Year Finalist

Nice job  Black is a real challenge but very rewarding when you do it right
Black is a real challenge but very rewarding when you do it right


 12-04-2009, 02:40 PM
#9
Burning Brakes


The owner was absolutely floored by the results, and after spending some time teaching him about the after-care of his new Vette, he looks forward to keeping it looking this nice for many years to come.
You are a true professional. What is the best way to keep it looking like this? I am so jealous. I have a '06 black Z that looks great in the garage but when the sun hits it you can see the defects. I will try to correct in the spring but I doubt it will get anywhere near this perfect. I wish you were in western NY to do mine.
You are a true professional. What is the best way to keep it looking like this? I am so jealous. I have a '06 black Z that looks great in the garage but when the sun hits it you can see the defects. I will try to correct in the spring but I doubt it will get anywhere near this perfect. I wish you were in western NY to do mine.
 12-04-2009, 11:52 PM
#11
Le Mans Master

absolutely beautiful! Fantastic job. Would you mind Pm'ing me what that exact job cost?
 12-05-2009, 06:46 AM
#14
Supporting Vendor
Thread Starter
Thanks Bryan, and likewise. Next time I need to work out my schedule so that we can work on a project together.
Thank you!
The owner was absolutely floored by the results, and after spending some time teaching him about the after-care of his new Vette, he looks forward to keeping it looking this nice for many years to come.
You are a true professional. What is the best way to keep it looking like this? I am so jealous. I have a '06 black Z that looks great in the garage but when the sun hits it you can see the defects. I will try to correct in the spring but I doubt it will get anywhere near this perfect. I wish you were in western NY to do mine.
You are a true professional. What is the best way to keep it looking like this? I am so jealous. I have a '06 black Z that looks great in the garage but when the sun hits it you can see the defects. I will try to correct in the spring but I doubt it will get anywhere near this perfect. I wish you were in western NY to do mine.
Thanks!
Thanks as well.
Last edited by Esoteric Detail; 12-10-2009 at 05:16 PM.

 12-07-2009, 09:30 AM
#17
Melting Slicks

You are a true professional. What is the best way to keep it looking like this? I am so jealous. I have a '06 black Z that looks great in the garage but when the sun hits it you can see the defects. I will try to correct in the spring but I doubt it will get anywhere near this perfect. I wish you were in western NY to do mine.
12-07-2009, 09:35 AM
#18
Supporting Vendor
Thread Starter
12-08-2009, 03:56 PM
#19
Instructor


Member Since: Aug 2009
Location: Goodyear Az
Posts: 120
Likes: 0
Received 0 Likes
on
0 Posts
Todd, what a great job. I love detailing as well to my car and love to see great stories such as this. Thank you so much for posting this for all to see, it really goes to show what proper detailing can do to a ride.