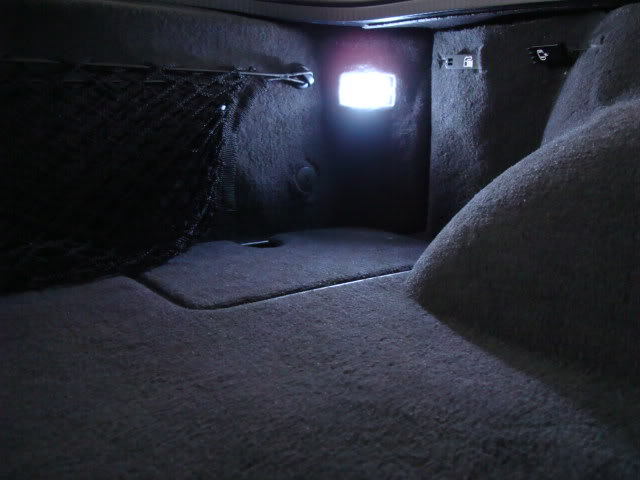
The trunk light may not seem all that important, but you'll sure miss it when you really need it. This how-to will walk you through replacing your trunk light.
By Jared Hammond - January 27, 2015
Contributors: jdmvette, gibear2k5, JWMotoring, hightechaccessory
This article applies to the Corvette C5 (1997-2004) and C6 (2005-2013).
The trunk light is one of those conveniences that we take for granted. You might not have even noticed there was a trunk light at all. But you'll certainly miss it if you need to look in your trunk at night. So if your trunk light burned out or you just want to mod it with new colorful LED lights. Don't worry, changing out your trunk lights is painless and easy. The following steps will guide you through the process.
Materials Needed
4-chip SMD Superflux LED 3.5V 80mA or 562 Plug n Play SMD LED
150 ohm resistor
Flathead screwdriver
Soldering iron
There are two kinds of LED bulbs we'll be covering. One is the 562 type LED bulb made specifically for the C5 and C6 Corvette. These are slightly more expensive and must be bought online, but they are much easier to install. The other is the cheaper, smaller, and brighter superflux LED bulb which can be bought either online or at a store, but is harder to install. This how-to will focus on the installation of the superflux LED bulb for those of you who want to take the DIY approach.
Step 1 - Remove the old trunk light
Use a flathead screwdriver to pry out the trunk light cover. Then remove the factory bulb from inside the cover.
Figure 1. Remove the trunk light cover.
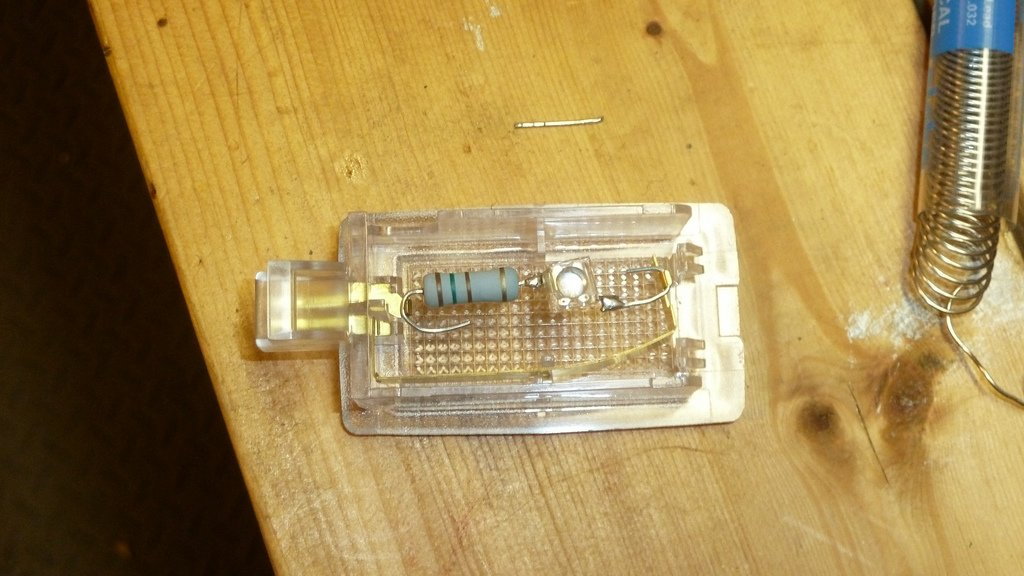
Step 2 - Solder the resistor to the new LED bulb
Trim one of the leads on the resistor so it is just long enough to be attached to the LED bulb. Solder it to the positive end of the LED bulb. Then take the remains of what you trimmed from the resistor and solder that to the negative end of the LED bulb. If you don't know which parts of the LED bulb are positive and negative look for the notch in the corner. That will be the negative end.
Pro Tip
If you purchase the plug and play SMD LED bulbs you can skip this step completely.
Figure 2. Plug and play LED bulbs.
Step 3 - Attach your new LED bulb to the trunk light cover
Wait for your soldering to cool for a few seconds then wrap the two leads around the prongs where the factory bulb was attached. Tighten it so that it isn't hanging loosely in the cover. Then trim off any excess in the leads.
Figure 3. Installing a DIY LED bulb.
Figure 4. Installing a plug and play LED bulb.
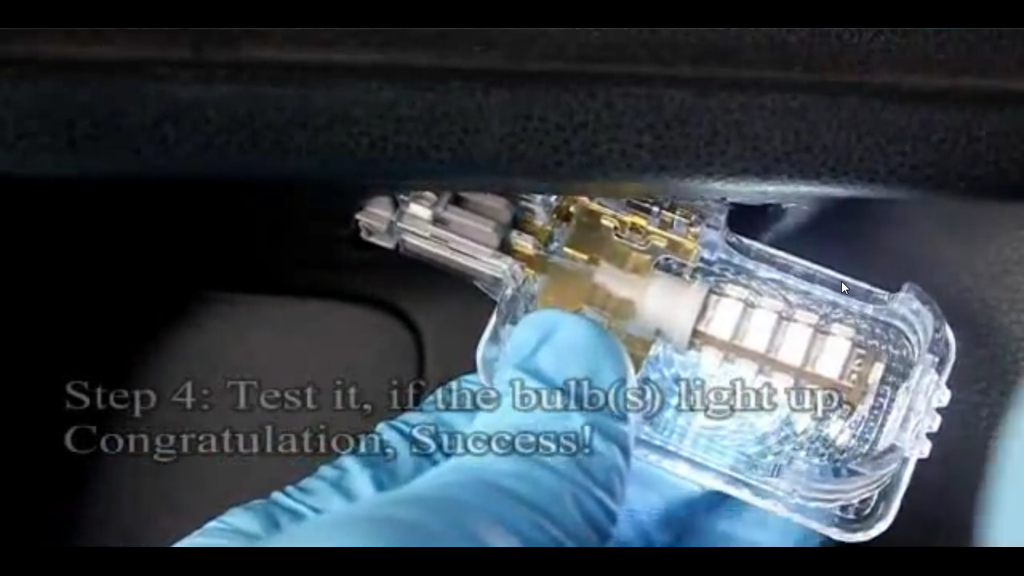
Step 4 - Reattach the trunk light cover
Your new trunk light should come on automatically once it's reattached. If it does not come on then you may have a problem with a loose lead, or the LED bulb may be soldered wrong. In the case of the plug and play LED bulb, all you need to do is take it out and rotate it. Once you've confirmed it works repeat the process for the other trunk light.
How to Replace Interior Lights with LEDs
Have you ever wondered how to replace interior stock lights with colored LEDs in your C5 or C6 Corvette? Read more to find out.
This article applies to the Corvette C5 ...
The 72-cent Modification
mpuzach, FortMorganAl, cclive
This is one of the cheapest and easiest modifications you can do for your Vette.
This article applies to the C6 Corvette (2005-2013).
While driving at night, ...
How to Replace Dome Light
Brighten up your interior by replacing your dome light!
This article applies to the C5 Corvette (1997-2004), C6 Corvette (2005-2013), and C7 Corvette (2014-current).
Each time you open ...
Plug N Play LED Interior Light Upgrade
Brighten up your 'Vette with this simple upgrade.
This article applies to the C5, C6 and C7 Corvette (1997-current).
Few things look more impressive than a brightly lit ...
Headlight Legal Requirements
Learn how to upgrade your headlights without breaking the law.
This article applies to the C5 Corvette (1997-2004), C6 Corvette (2005-2013) and C7 Corvette (2014-current).
Headlight ...
How to Install Foglight HIDs
Travel in fog sometimes and can't see even a few feet in front of you?
This article applies to the C6 Corvette (2005-2013).
Fog lights are essential to the driver's safety when it ...